Converting an old entertainment cabinet into a DIY chick brooder is a fun weekend project! Here’s how to create a sturdy and safe brooder that your chicks will love!

A few years ago, I decided to turn an old entertainment cabinet into a DIY chick brooder. The brooder has been amazing! It’s super easy to clean and it looks much nicer than the temporary brooders we’ve used in the past. It works great for chicks but, if needed, it’s also big enough to house a sick chicken who may need to be isolated. You can check it out and read the full project tutorial here.
Recently, my friend said she would love to make a similar brooder so she could have a more permanent brooder. She found an old entertainment cabinet for $20 on Facebook Marketplace and we set out to turn it into an all-purpose chick brooder! It’s a bit different style than the one I helped my friend make, but with a little creativity, you can create your own beautiful chick brooder in no time!
Each cabinet design will be a bit different depending on the type of entertainment cabinet you get. It’s important to take time to consider the steadiness of the entertainment center. You want it to be in good shape so that it’s easy to convert to a safe chick brooder. Take time to assess your cabinet and consider the best way to turn it into a brooder.
Supplies We Used:
- Old entertainment center
- Hardware cloth or chicken wire
- Washers (1/8 x 1 inch)
- Small wood screws (1 inch – 1-1/2 inches long)
- Safety Latches
- Waterproof Utility Panel
- Industrial Adhesive
- Waterproof silicone caulk
- Self-tapping screw hook
- Caulk gun
- Drill
- Jigsaw
- Heavy-duty scissors
- Hole Saw Drill Bit (1-1/2 inch)
How We Created the Chick Brooder:
- Prep the cabinet as needed: The entertainment cabinet that my friend bought had little wood slats across the front door panels. We wanted to remove the top portion (about 3/4 of them) to allow airflow and the ability to check in on the chicks. We left the bottom 1/4 of the slats to help keep the bedding in the brooder and to keep the chicks more secure. Remove the top 3/4 of the wood slats, we cut the individual slats down the middle using a jigsaw. This allowed us to easily remove them from the door frames.

- Attach hardware cloth or chicken wire to doors: Next, we cut hardware cloth to size, flattened it and secured it to the inside of the door panels. We secured the hardware cloth to the door frames using 1/8 x 1-inch washers and some small wood screws.

- Attach safety latches to doors: The doors were held shut with small magnets, but we wanted to make sure it was extra secure since my friend has a few cats. We used two safety latches – one on the top of the doors and one on the bottom. You can purchase these safety latches at most hardware stores in the same aisle with the hinges and handles.

- Measure and cut the waterproof utility panel to size: The next step was to make the brooder waterproof for easy cleaning and to ensure that it lasts for many years. We purchased an 8 ft x 4 ft waterproof utility panel, which can be found at most hardware stores near the lumber. After measuring the floor and walls of the brooder, we cut the panel to size using heavy-duty scissors. We decided to only cover about 1 foot of the walls with the waterproof paneling, but you can cover the entire wall if you want.
- Attach the waterproof panels: Once the utility panel is cut to size, glue the pieces into place using an industrial adhesive, like Liquid Nails or Loctite All Purpose Adhesive. Be sure to smooth out any bumps or air bubbles as you apply the paneling to the cabinet.

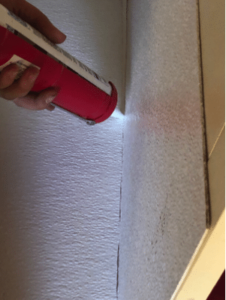
- Caulk the seams: After the panels are applied, caulk all the seams using a waterproof silicone caulking. This will help ensure that moisture doesn’t seep between the layers of the utility panel and the cabinet. Let the caulk dry overnight.

- Hang the heat lamp: If you are using a heat lamp for your heat source, you can drill a hole in the top back wall of the cabinet for the lamp power cord. We did this using a 1-1/2 inch hole saw drill bit.

Then, we screwed a self-tapping screw hook into the top of the brooder so that the heat lamp could hang from it. Double-check to make sure the hook is completely screwed in and secure before using the heat lamp.

- Add bedding, food, water and chicks! My friend now has a safe, permanent, easy to clean brooder that looks great and is super functional. Plus, her new chicks love their DIY brooder! It gives them plenty of space to hop around and grow while staying safe and secure!

Kaylee Vaughn is a suburban homesteader, caring for chickens, goats, and a large garden on a little less than an acre. She and her family strive to create the most efficient homestead possible in the small space we have available. Her chickens are not only beautiful yard ornaments but also a vital part of their homestead management practices! “We utilize them to produce manure, control pests, turn compost, and more.” Kaylee’s nick-named them “the gardeners” because they are always in the garden, working hard – and redecorating on occasion, too! You can follow Kaylee through her website.


1 Comment
I had an idea about having a poop catcher drawer as they get a little older underneath. Maybe a wire floor that can be put in area, wood shavings and it falls into drawer underneath?