Part Two of a two-part series on butchering chickens
Read Part One
by Krislee Johnson
Our morning started early on the day of butcher. After breakfast and some coffee we were eager to get started. I think we were most interested in getting past the actual act of dispatching birds. That would be no fun for anyone involved. Another issue weighing heavily on my mind was letting go of one of my favorite birds, a gentle rooster named Benny.
Too Many Roosters
Butchering Benny was a very difficult decision for me to make. Not only was he one of my first birds but he was one of the most gentle birds to handle. Unfortunately, he had a weakness for the ladies. Due to the fact he was not an Alpha male, he was forced to sneak around when mating. As a result of his rough love making style, many of my hens had bare shoulders and backs. Sadly, he would round out the 10 birds slated for butcher.
![]()

Many of the young roosters, ducks and Benny were separated out the night before. Two others, the meat bird and a hen named Red were added to the group in the morning. Red unfortunately had a long history of laying eggs with defective and fragile shells. I fed layer feed, oyster shell and even chicken/duck eggshell but nothing seemed to help. It was no longer worth keeping her when she wasn’t able to produce a normal egg.
Set-up for Processing
Our set up was fairly simple and easy to assemble. My husband and I mirrored closely the example we witnessed at our neighbor’s butcher day. We had a cleaning table complete with running water via a garden hose. The table had a small cutting board, a lined bucket for entrails, a bowl for giblets and a plastic scrubber to help remove fine chicken feathers. Once the birds were defeathered and eviscerated they went directly into a clean tub with ice cold water. Parting out, deboning and packaging would take place in our kitchen.

![]()
My husband did the dirty work of collecting each bird and completing the initial dispatch. It was a simple process made easy with this standing killing cone station. We went with an XL size cone that could accommodate larger ducks, geese and our future butcher turkeys. Although it was still functional for use with the chickens, he had to keep hold of their feet so they couldn’t use their legs to escape. I would recommend using a size L or an M3 sized cone when working mainly with Dual Duty or Cornish Cross chickens.
Keeping the ground clean was also a top priority. A bucket was mounted for the collection of heads & draining the carcass. The weighted base allowed the station to stay stable while birds flapped about. The process was very quick and humane.
One important tool that shouldn’t be overlooked is a very sharp knife. In our case, we used a new Deboning Knife purchased from Amazon. His cuts were precise, quick and with no struggle.
DeFeathering
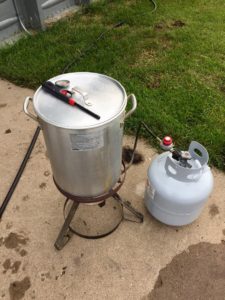
Prior to placing the birds in the defeather machine they had to be prepped with hot water. We used a propane turkey fryer to heat the water between 145-150 degrees Fahrenheit. Due to it being a rather chilly day we had to keep the water heated to the top of that range. My husband swished and dipped each bird for about 3-5 seconds.

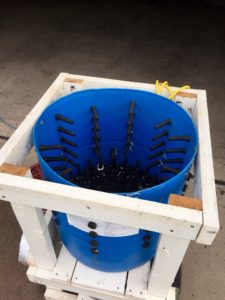
![]() Next, the birds were then tumbled one at a time in a borrowed defeather machine. It made quick work of feather removal. A couple birds had to be dunked in the hot water a second time which is not uncommon. Any remaining stray feathers were simple enough to remove by hand or were cut off in the cleaning process.
Next, the birds were then tumbled one at a time in a borrowed defeather machine. It made quick work of feather removal. A couple birds had to be dunked in the hot water a second time which is not uncommon. Any remaining stray feathers were simple enough to remove by hand or were cut off in the cleaning process.
The Different Cuts
At the cleaning table, feet were removed first, mainly to get them out of the way. A small slice was then made at the back side base of the neck skin and the neck pulled through this opening. Because the birds hadn’t been fed since the previous day it made extracting the food-storing crop easy. The excess neck skin, esophagus and the crop were removed and the neck cut off at the base of the body.
Turning the bird on it’s back a cut was made just under the tapered end of the breast area. While being careful not to puncture any internal organs this cut was expanded down each side of the soft belly. This opening allowed me to reach my hand into the bird to remove all of the organs. The liver and heart were extracted and placed in the giblet bowl. Once the innards were outside the body cavity I traced my knife down each side of a “V” shaped notch that runs along either side of the anus. This method allowed for a clean final cut through the tail releasing the gut into my discard bucket.
![]()
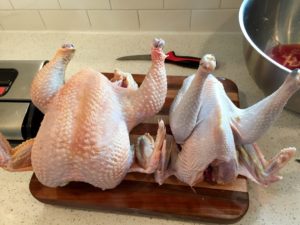
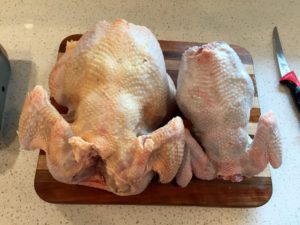
When all was said and done the cleaned birds were taken inside for packaging. We had quite a difference in sizes with all of the birds that went to butcher. In the photos above it is easy to see the meat volume gained through raising Cornish Cross meat birds. On the left is the 10 week old Cornish Cross while the right is a 1 year old Dual Duty adult rooster.![]()

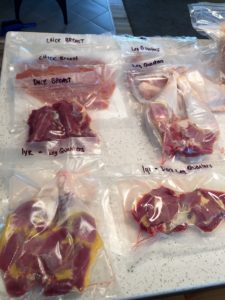
![]() We ended up with a good amount of meat for the freezer. To avoid freezer burn we opted to purchase a vacuum sealer with rolls of plastic bag sheeting. Bags could be made to fit, which worked well for some of the larger birds such as the Cornish Cross and the Pekin Duck.
We ended up with a good amount of meat for the freezer. To avoid freezer burn we opted to purchase a vacuum sealer with rolls of plastic bag sheeting. Bags could be made to fit, which worked well for some of the larger birds such as the Cornish Cross and the Pekin Duck.
All things considered, I think our first butcher day went well. It was nice to learn on a small group of birds in various sizes and types. There isn’t much I would choose to do differently beyond the smaller sized killing cone for chickens.
Next year, this experience will have prepared us for the 30+ Cornish Cross we hope to raise for butcher. In the end, I only cried once and that was for my dear, sweet Benny. I’m simply thankful for the education this farm life lesson has given us. That, and the added meat in the freezer.

In memory of Sir Eggs Benedict
#LifeOn25Acres

