What to build your own coop and chicken yard? Frank Hyman shares information about getting to know and using your hand tools. Photos by author.
You can read some of Frank’s other tool- and fencing-focused articles:
Get the Most from Your Posts
Great Gates for the Girls
Power tools get all the attention. But it’s the smaller hand tools that can make a big difference in how well the project goes and how much job satisfaction a henkeeper has in it. Here’s a sample of a few tools that a backyard henkeeper will want to have around for repairs, remodeling, or new construction.

A Speed Square helps you keep things square, as well as mark cut lines. Note the drill sleeve on the power drill: It keeps the bit aligned with the screw head.
Speed Square
This is one of my go-to tools. First off, it’s indestructible and has no moving parts to fail. It’s also the right size to fit snugly in my back pocket. The Speed Square is a flat, triangular piece of metal, and each of its three sides has a purpose. One side has marks for measuring or marking lengths. Another side has marks for reading angles. And another side has a lip so you can slap the Speed Square on a plank and mark a perfect 90-degree line for cutting a board (or check a new board to make sure the ends are square). You can flip the lip and use it to draw a perfect 45-degree angle on a plank. And since a Speed Square is a right triangle (one corner is a 90-degree angle), you can use it to make sure that corners of a raised bed or other structure are square, or that the blade on your circular saw is square with the shoe.
Why is it called a Speed Square (and why is it capitalized)? Carpenter Albert Swanson wanted a tool for laying out roof rafters that would be faster than a combination square or a roofing square. He invented this little gem in 1925 and named it “Speed Square.” And now, like Kleenex and Linoleum, it has become the common name for this dandy tool.
Magnetic Drill Sleeve
I can’t recommend these enough. They only cost about $5, but they save a lot of hassle. They fit into any drill; you can slip a wide range of bits into the end; and it’s magnetic, so you’re less likely to drop your screw. And the sleeve slides over the screw, which helps hold it in place until the threads bite the wood.
The sleeve also makes it easier to keep the bit and screw in alignment. If you’ve been stripping bits or screw heads, it isn’t the fault of the tool; it’s operator-error. If the bit and the screw aren’t in alignment, you’ll hear that horrible sound of the screw head being stripped to the point where the bit won’t drive it anymore. So stop as soon as you hear that sound, and then take your time and get the bit aligned with the screw. The sleeve helps with that, but it does need a little help from you.

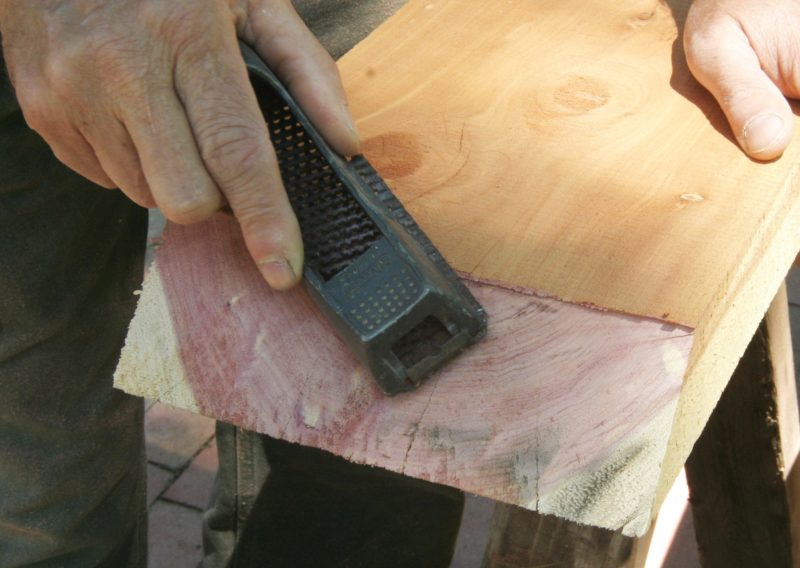
Box rasps are good for cleaning up cuts that may be a little ragged.
Plane rasp
There are tools called “wood rasps” and “box planes.” The plane rasp, sometimes called a “box rasp” (a better description), combines some of the features of both tools. Like a box plane, it fits nicely in the cup of one hand. And like a wood rasp, it grinds more wood than sandpaper or a plane. It’s not the kind of tool that a furniture maker or a trim carpenter would use often. But for the kind of basic framing carpentry that a henkeeper would do, it’s a handy and simple tool.
Sometimes a cut edge is sharp and could invite splinters. Smooth that edge with a box rasp. Or perhaps your saw left a ragged edge on a plank. Flatten it out with a few swipes of the box rasp.
The cutting surface of the box rasp resembles a cheese grater. Numerous holes with sharp edges shear off a bit of material. If you get a lot of use from your box rasp, you’ll need to unscrew and replace the cutting surface, as those hole edges can’t be sharpened economically.

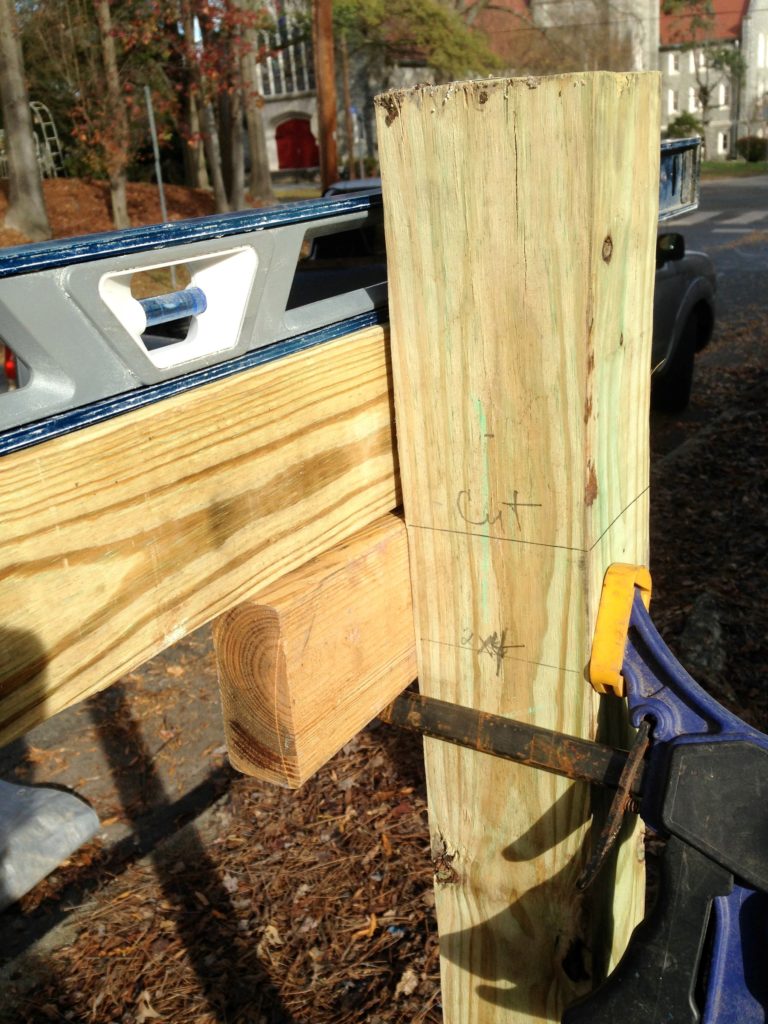
Two uses for quick clamps: They hold a piece of wood to the sawhorse so it won’t move as you cut it….

…And they can hold a stringer to a post so you can check the stringer for level or to mark the post for cutting off the top.
Quick clamp
Some projects absolutely demand having a helper. But in many cases, a clamp can replace a helper. Granted, a clamp isn’t as chatty as a helper. That may be good or bad.
But conventional clamps — bar clamps, C-clamps — take two hands to attach or release. Quick clamps, invented a few decades ago, can be installed and removed with one hand. Hold the pistol-grip handle in one hand, apply to the project, and squeeze the trigger to tighten it up. When you’re done, grab the handle, squeeze the release lever, and it’ll come loose. When you’re working alone, a quick clamp can save lots of time and fiddling around.

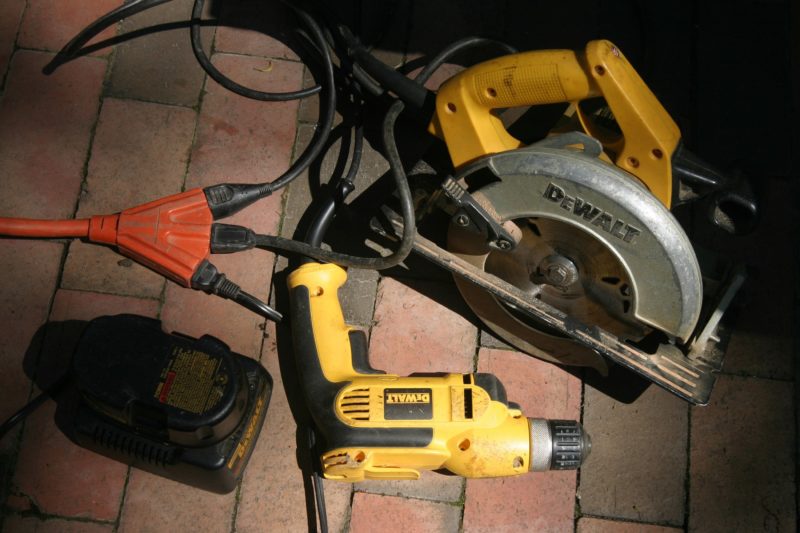
A three-way plug keeps all your tools (and battery chargers) ready to go.
Three-way Plug
As a rule, expect that you’ll be using more than one power tool on a carpentry projects — perhaps a jigsaw to cut planks, a drill to fasten them together, and maybe a sander or router to get a more finished look. And if you’re in the South in summer, you may also be running a big fan to stay cool. I know I do.
Switching plugs back and forth slows things down, and using more than one cord is an unnecessary expense. Instead, invest in a three-way plug (sometimes inaccurately called a “pigtail,” which is really an electrical component) to save time and money. If you need more than three tools, put another three-way on the first one, allowing power for five tools at any time.
Some carpenters use power strips, which allow for half-a-dozen tools. But office equipment on a job site just looks wrong to me.
I keep all my cords and three-ways from getting separated by storing them in an empty, black, plastic 15-gallon nursery pot with handles.

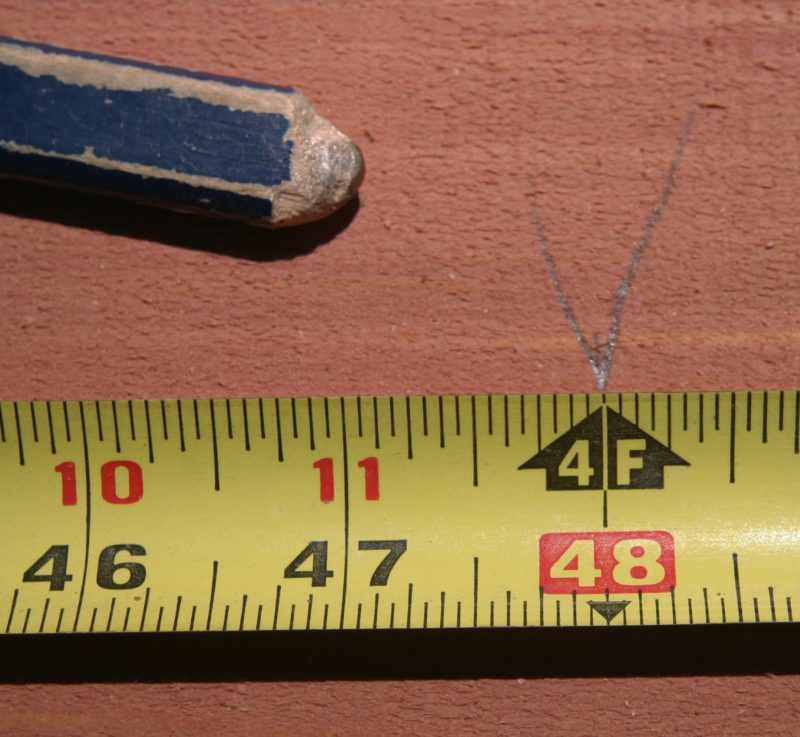
A good tape measure is worth its weight in fresh eggs for marking cuts with what’s called a “crow’s foot” (if crows only had two toes).
Tape measure
Almost all tape measures are disappointing in one way or another — which is strange, given how necessary they are in almost any home, garden, or farm project. For a tool that should be reliable and handy, they’re mostly a handful of small problems. Either the hook doesn’t stay hooked; the tape is too flimsy to extend for much distance; or the spring doesn’t retract the tape without plenty of assistance, or it retracts so fast it hits your finger. Ouch. And then the tape or the spring breaks anyway, so you must throw it away and buy another one. You spend even more money hoping for a marginally better tape measure. But still they disappoint.
Finally, a company has invested in a tape measure that works well and should last for a long time. Milwaukee Tools has a red-and-black tape that solves all those problems, and it only costs a little more than what passes as top-of-the-line tape measures.
Milwaukee Tools’ tap measure has a 360-degree hook, so you can pull a measurement off the most obtuse angle. The tape is stiff enough to extend out 9 feet unsupported. It extends and retracts easily, and the belt clip is designed so that it doesn’t tear up the fabric of your pants pocket if that’s where you carry it, as I do. It even has a stop to protect your finger. The tape measure feels sturdy enough that you may be able to pass it down to the next generation.
Nail Starter Course
There’s probably no better skill to have around the farmstead than carpentry. Because only about 20 percent of farming is actual farming. The other 80 percent is just fixing things. But carpentry won’t seem like a lot of fun if you’re always nursing a black-and-blue thumb because you have yet to master the gentle art of starting a nail.
As a teenager, I lost a thumbnail after swinging and missing the nail I was aiming for. I finally figured out my problem was eye-hand coordination — not the lack of it, but its presence. Many people who have trouble consistently hitting a nail on its head mistakenly believe they lack eye-hand coordination. But answer me this: Have you ever glanced at a doorknob, reached for it, and missed? That’s an instance of the eye-hand coordination we’re all born with.
The problem comes in situations such as starting a nail or swinging at a baseball when we’re feeling intimidated. We’re afraid we’ll miss the nail and hit our thumb or that we’ll miss the ball and feel embarrassed. Or worse, that we’ll get beaned by the ball. Quite naturally in such cases, we flinch and avert our eyes. Holding a nail in one hand and a heavy hammer in the other, we worry about our thumb and do what? We glance right at it. Our hand, with in-born, perfect eye-hand coordination, thinks our thumb is the target and swings for it — ouch. Mission accomplished.
The solution in these cases is to use some baby steps to train your eye not to flinch. If your eye can stay focused on the center of the nail head without looking away, pretty soon neighbors will be begging you to help them with their carpentry projects.
Here are a few more options that make starting a nail less intimidating.
- Remove the worry about hitting your thumb. Depending on the size of the nail, you could hold it with pliers, the teeth of a pocket comb, or a thin piece of wood with a notch in it. You could also use a piece of paper, cardboard, tar paper, or a piece of roof shingle to hold the nail until it’s started.
- Match the hammer to your strength. The standard hammer weighs 16 ounces. As a young man, I chose a 20-ounce hammer as a way to get stronger and to better fit in with the experienced carpenters. The extra weight cost me a few bruises, but I mastered it. Unless you’re feeling competitive, you may want to go the other direction and build your skills with a 12-ounce hammer. It’ll take more whacks to set the nail and drive it home, but it may be a better fit for your forearm strength.
- Get more control of your hammer. There’s no law against choking up on the hammer. That means you don’t have to hold it at the very end. Gripping the middle or top of the handle to get a nail started is fair. As you get more comfortable, slide your hand down toward the bottom so you’ll have more leverage and can drive more nails with less labor.
- Tune out the banging sound of the hammer. I’ve watched plenty of aspiring carpenters flinch and squeeze their eyes shut at the last moment. Ear protectors will dull the explosive sound of the hammer striking the nail head. (A smaller hammer will be quieter too.)
You may not need all or any of these tips. You already have great eye-hand coordination. The key is to train your eye not to look away — or at your thumb. Learn to keep your eye on the ball, so to speak, and every swing you make will count.
Frank Hyman is a carpenter, designer, and the author of the DIY backyard chicken keeping book Hentopia.


