Movable boards for poultry droppings help with cleanup and let you use chicken manure for composting. Liz Fulghum explains how to easily build a drop board. All photos by author.
It’s an irrefutable fact: Chickens poop, and they poop a lot. In the coop, their favorite place to poop is off the edge of the roost when they’re sleeping at night. This means that droppings build up right under the roost in a very specific, concentrated line. Ultimately, this becomes the dirtiest place in the coop, and accounts for most of the waste that fouls coop bedding.
Whether you’re pursuing low-maintenance chicken management and using the deep litter method, or you just want to make coop clean outs easier and less frequent, a dropping board may just be your next secret weapon against chicken poop.
So let’s talk about poop and take a look at what exactly a dropping board is, its benefits, and how to construct a simple one for your own chicken coop.
What’s a Dropping Board?
A dropping board is simply a tray that’s installed just below the roost. It’s designed to collect chicken droppings at night so they don’t land on your regular coop bedding. The idea is that you clean the dropping board more frequently so you can clean the entire coop less frequently. It should just take a few minutes once or twice a week to stay on top of cleaning, even if you have quite a few birds.
Other than making cleaning easier and faster, a dropping board has a few other benefits:
- Provides you an opportunity to identify illness in your birds by observing overnight droppings that otherwise would’ve been buried in the bedding on the coop floor. This can help you discover health issues faster than you might otherwise.
- Reduces moisture in the coop, which helps keep your chickens cleaner, warmer, and healthier.
- Reduces ammonia, which aids in maintaining chickens’ healthy respiratory systems.
- Reduces odor and flies in the warm summer months.
- Saves money on bedding by reducing the frequency of full coop cleanings.
Dropping boards aren’t a completely new idea, but there’s still really no standard design. If you look around, people have used everything from flat plastic trays, to fabric hammocks, to pieces of Formica countertop, to old scrap wood pieces. There are, however, a few generally accepted guidelines for what’s practical and also what works well:
- Make it wide enough to catch all the droppings that fall when your chickens are roosting.
- Cover it with something, such as peel and stick tiles or sheet vinyl flooring, to make cleaning easy.
- Fill it with sand, Sweet PDZ, or similar litter material to make it easy to scoop and scrape the droppings off, and help absorb moisture.
- Have edges to hold the litter material in.
- Make it easy to remove for deep cleaning.
If you’re ready to spend less time cleaning out your coop and want to try building your own dropping board, here’s instructions for making your own with materials you might just have laying around.
How to Build Your Dropping Board
Tools and Materials:
- Tape Measure
- Pencil
- Chop or handsaw
- Table saw or circular saw
- Drill with screwdriver bit
- Sandpaper
- Plywood
The plywood will form the base of your dropping try, so it should be long enough to cover the length of your coop and wide enough to cover the entire “drop zone” of chicken waste when they’re roosting. - 1×2, or similar sized wood
These will be cut and used to create the edges of your dropping board. You’ll need two long pieces, roughly the length of your board. You’ll want the edges to be tall enough to keep litter inside the boundaries of the dropping board. - Vinyl stick tile or sheet vinyl
- Vinyl glue (if using sheet vinyl)
- Scrap wood blocks for supporting the dropping board inside the coop (2x2s or 2x4s scrap would be ideal for this)
- Screws
Because everyone’s coop layout and size is different, you’ll need to take measurements of your own space and use your judgement on sizing and placement for your dropping board. Don’t have a selection of power tools at home? Premeasure everything and purchase the materials at your local home improvement store, where they can do all of the required cuts at no additional cost. Most of the construction is simply assembly.
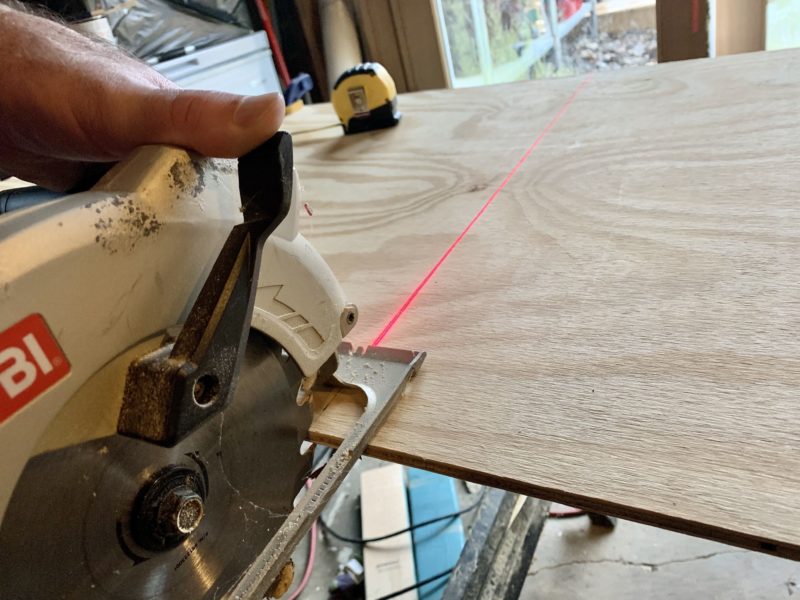
Measure the inside of your coop to determine dimensions for the base of your dropping board. Cut the base with a circular saw.
1 – Begin by measuring how wide and long the dropping board needs to be. Hint: The length should pretty much be the same as your roost, and the width should give enough coverage to catch all the droppings. Ten inches wide seems to work for most regular-sized chickens, if you’re using a 2×4 roost, but you can do an in-coop poop inspection to see where droppings are actually landing and figure out the best size for your birds based on the actual drop zone.
2 – Cut the plywood to the correct size using a table saw or circular saw. If you use a circular saw, you can clamp a spare piece of wood to the plywood as a guide rail to help ensure straight cuts. Sand the edges to remove any splinters.
3 – Measure and cut two pieces of 1×2 wood to length to form long edges of the dropping board. Make them about 2 inches shorter than the length of the board. Sand the ends enough to remove any splinters.
4 – Screw the 1×2 pieces to the outer edges of the plywood and to each other to create the sides of the tray.
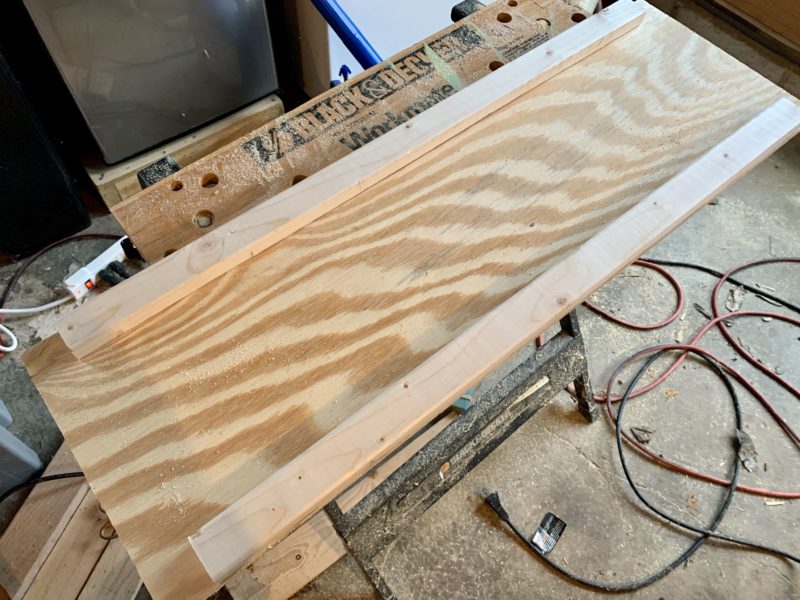
Leaving the edges of the dropping board open makes it easy to slide into your coop, and allows you to easily scrape it off when cleaning.
5 – If you’re using stick tiles, measure, cut, and install them to the base of the dropping board. If you’re using sheet vinyl, you can opt to actually cover the long edges of the board for more protection. Leave the short ends uncovered so you can easily slide the dropping board in and out of your coop. (See the next step for more details.)
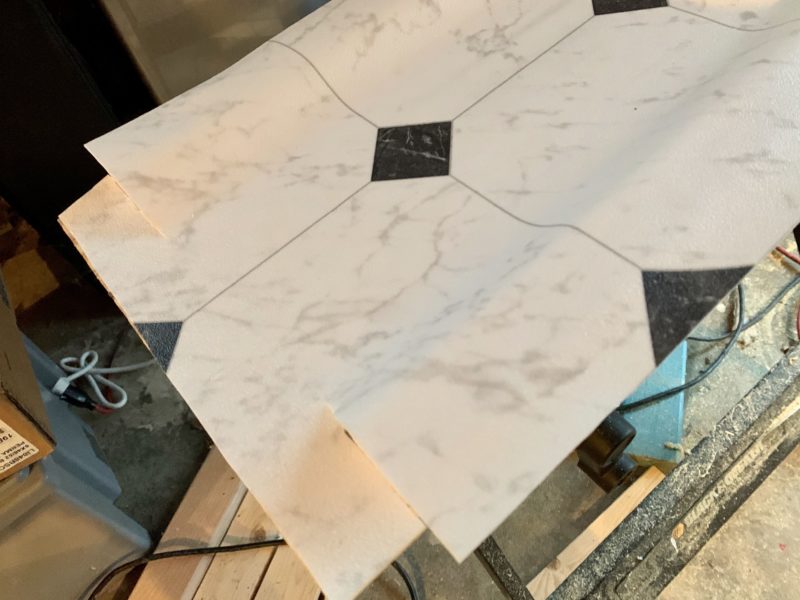
The sheet vinyl can easily be trimmed after it’s glued on. The ends have been trimmed so they fit nicely over the base and the sides.
6 – Cut four blocks of scrap wood roughly as long as the short edge of your dropping board. Two blocks will be attached to each of the coop sides, with enough vertical space between them that your dropping board can slide in and out between them. This helps keep the dropping board secure while at the same time making it easy to remove. The board should be placed about halfway between the floor of the coop and the roost, or a little higher. Remember, wood will expand and contract depending on the humidity level in the air, so don’t make the fit so tight that it can’t accommodate seasonal swelling. Attach the four scrap blocks to the coop using screws.
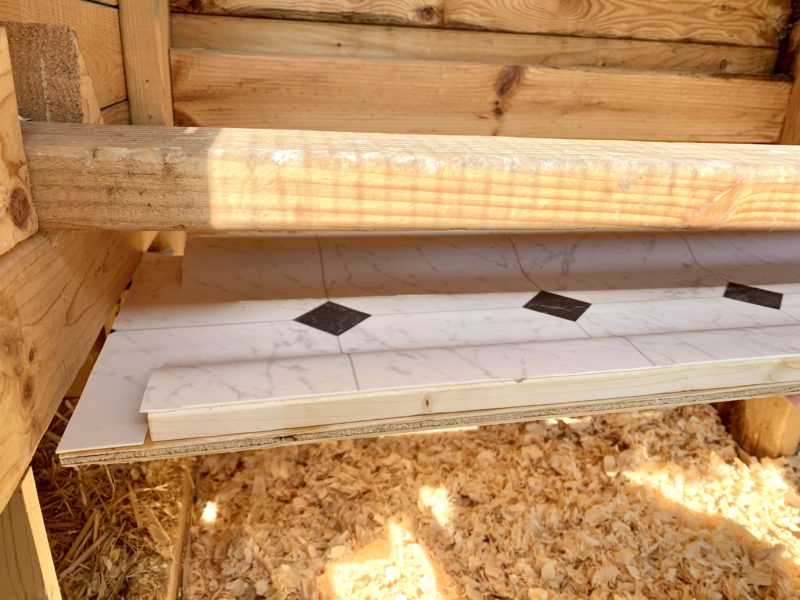
Measuring for the shelf–in our coop, the roost is right above both the doors and the nesting box. This meant that the dropping board had to sit up higher.

Scrap wood screwed in to hold up the dropping board.
7 – Fill the dropping board with sand or Sweet PDZ. While there’s several different materials, such as sand, that you could choose for litter in the dropping board, Sweet PDZ has the added benefit of keeping things smelling fresh and clean. In the summer months, it helps cut down on the smell of the coop significantly.
Use just enough to lightly, but fully, cover the board. Essentially, the material in the dropping board is designed to work like kitty litter – absorbing liquid, helping clump up droppings, and keep them from sticking to the tile. For this reason, you don’t need tons of litter, just enough to keep the board lightly covered in an even coat.
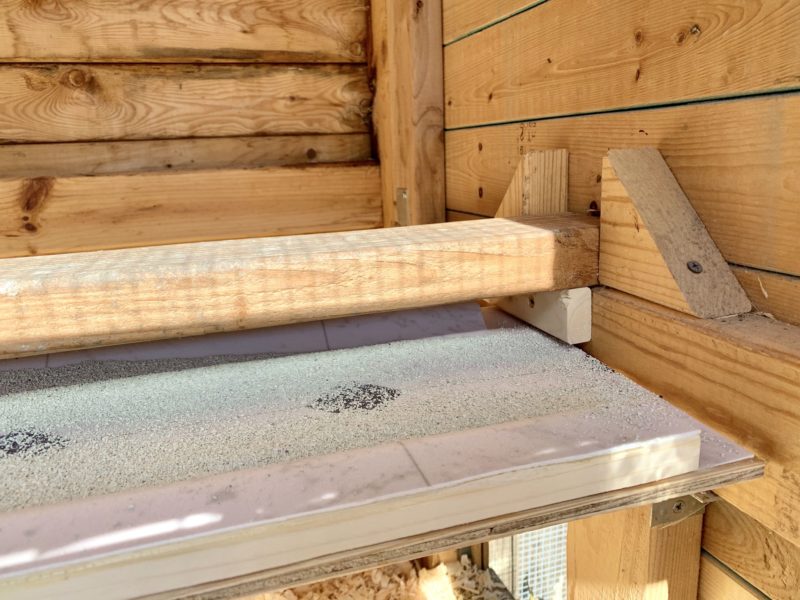
Final install with Sweet PDZ. The board slides in and out easily to clean and maintain.
8 – Install board in your coop and watch your chickens check out the new addition! After an initial inspection, the chickens will ignore the boards and won’t make a habit of walking around them.
More Roosts, More Boards
If you have a larger coop, you might have more than one roost. Armed with this basic plan, it’s easy to make additional boards or adjust the sizing of a single one.
Have multiple roosts that are positioned perpendicular to each other on different walls? Build separate dropping boards for each of them. Stagger them vertically, as necessary, so that they all fit neatly below their associated roosts.
Have two roosts running parallel next to each other? Widen your dropping board to accommodate them both.
Using and Maintaining Your New Dropping Board
It just takes a few minutes once or twice a week to clean your new dropping board. You don’t have to remove the board for these regular cleanings, unless you really want to. Using a kitty litter scoop, a large slotted spoon, or a trowel, simply scoop the droppings out of the tray and dispose of them in your compost area. Refill the tray if it’s a little low on litter.
Once every few months, plan to remove the tray, clean all the litter out, and give a it a good scrub with your deep cleaner of choice. Let dry, add in new litter, and reinstall.
Finally …
Whether you’re looking for a way to reduce cleaning, or just want to keep your chicken’s home cleaner and fresher, a dropping board can help. Building one is a great weekend project and an immediate upgrade to your coop. Best of all, it’s one of those things that doesn’t cost very much in time or money, but can have a huge impact for you and your chickens. It’s win-win all the way around.
Liz Fulghum is an entrepreneur and technologist who also has a passion for low-maintenance, productive gardening. Her urban backyard homestead is an oasis from busy days and home to raised vegetable beds, fruit trees and shrubs, bees, and a small flock of chickens. You can follow her on Instagram @LizFulghum.


3 Comments
This is the easiest and simplest way to build a droppings board that I’ve seen yet! I’m going to build it as soon as I pick up the sand (I already use PDZ for my horses- great stuff).
Speaking of sand, is it correct that construction sand is the safest, and not playground sand?
Thanks!
I was wondering, do I need a dropping board if I use the Deep Litter Method?
I was just thinking about that very thing. I’m using the deep-litter method, and I’m definitely going to build this droppings board. Their perch is at the least-accessible end of the coop, and getting down in their to stir and cover the droppings and shavings every day has become uncomfortable and hot and sometimes kinda stinky. I’d much rather slide out this board, wipe it off, and slide it back in, all while standing upright. I’m old and busted up, so I’ll do anything that doesn’t make my body hurt and will also help my birds stay healthy!