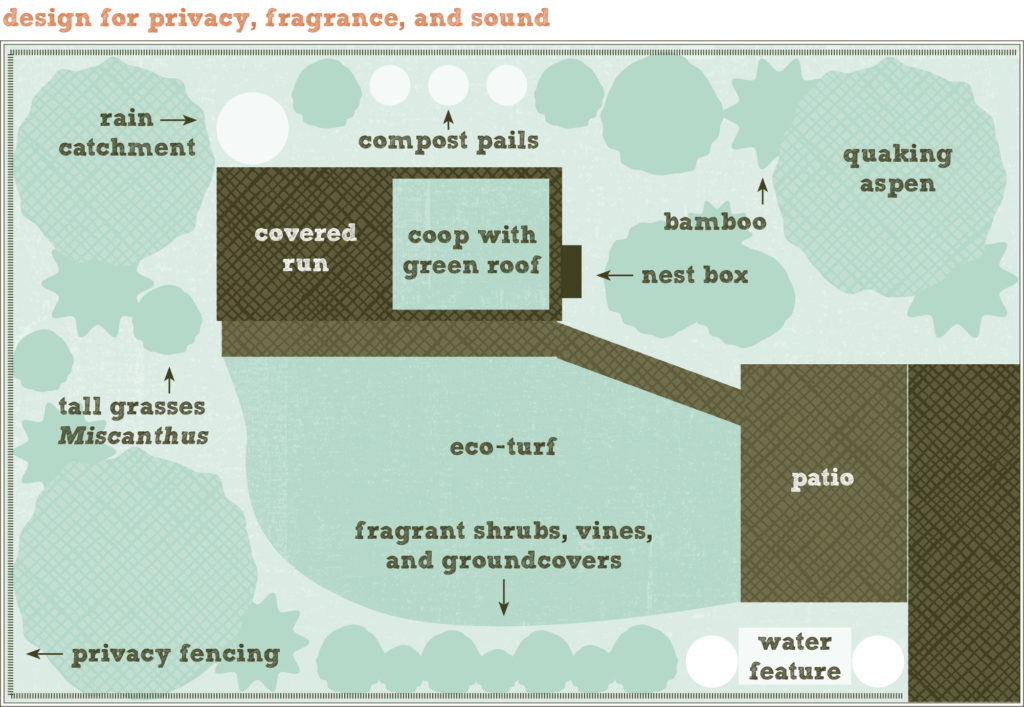
A well-designed landscape can transform your garden into an extension of your home, offering an attractive and productive outdoor living space. For our feathered friends, a well-designed garden can offer protection and safe shelter as well as food for them to forage. While landscape design is probably not the first thing you think of when getting ready to bring home some chicks, it is an important consideration for raising birds that will live in your garden—especially if you want them to be free ranging. Whether you are starting with a blank slate or working with a fully established mature landscape, there are several steps to take in planning your chicken-friendly garden.
CREATING A PLAN
To begin, you’ll need a base plan of your garden that shows the house footprint and property lines. There are resources where you can get this information without having to do all the measuring yourself. A good place to start is the Internet. Often there are online county records of your property. Not all counties have this information available online, but you’ll want to check. Another place to look is in the paperwork from when your house was purchased. Often the appraisal documents include a drawing of the lot plan and measurements. You can also check out online satellite imagery. Especially in more populated areas, mapping websites will have bird’s-eye satellite views of the land. If none of these options is fruitful, you’ll want to get out the measuring tape and head outside to start drawing your base plan.

Draw all the existing elements that are going to stay. On a large piece of paper and with pencil, draw the property lines, the footprint of the house and any outbuildings, and all the existing trees or shrubs that are going to stay. Include all measurements and make the drawing close to scale.
Create a wish list of the elements you would like to include in your plan. On a separate piece of paper, list everything you want to include in your garden plan, such as the coop, the run, an orchard, and a raised vegetable bed. Your list may be long or short, but list everything you want to include and eliminate as you go, rather than trying to add an element to the design later. This wish list will help you decide how to assign and divide up your space.
Besides the essential chicken infrastructure, other items you might want on your wish list are a children’s play area, sandbox, entertainment or patio space, fire pit, greenhouse, and hammock area. Browse garden magazines, books, and websites for ideas, to help you prioritize what is most important to you, your lifestyle, and your family’s needs.
Chart your yard’s sun exposure. It’s important to know the exposure in your yard, because it will help determine where you site elements in the garden and what plants you choose. Start by locating north. Figure out where the sun rises in the morning and where it sets at dusk. Throughout the seasons, these locations will change on the horizon. The sun creates different light and shadow patterns during different times of the year. An area that is in full shade all winter long may get direct sunlight all day in summer, dramatically changing what you place there. Also, your deciduous trees will let much more light through them in the winter, when their leaves have dropped, than they are leafed out in the summer.
I like to use colored pencils to shade in these different exposures:
– Full sun. A full-sun location should get 6 hours or more of direct sunlight during the growing season.
– Partial sun and shade. An area with partial sun and shade will get 4 to 6 hours of direct sunlight during the day.
– Full shade. An area of full shade gets 4 hours or less of direct sunlight during the growing season.
The growing season can usually be defined by the time of year between the last frost in the spring and the first frost in the fall. It varies in different climates (both micro and macroclimates) throughout any region and can be caused by environmental factors such as elevation, temperature, and rainfall. To locate your climate zone, check the table on page 204 which shows USDA plant hardiness zones based on average minimum winter temperatures. A map of the zones is also available online.
I live in a Zone 7 microclimate: it is cooler than the nearby cities, which have an urban heat island effect and are Zone 8. The warmer the climate, the higher the USDA zone number; for example, areas near Anchorage, Alaska, are Zone 4 and those near Miami, Florida, are Zone 10.
Note the microclimate(s) in your landscape. Are there areas in your backyard that are hotter or colder than others? Are there areas that are lower or higher in elevation, where wind would affect the plants? Are you close to a large body of water or in the northern shadow of a large hill or a tall building?
Mark any areas of concern. For example, is there a nasty view that you would love to block or a peering neighbor who makes you want more privacy? Is there an area that collects standing water during parts of the year?
Draw in major functional garden features. In mapping out how you want to use the space and prioritizing use of the land, first identify what major functional features dictate where you place other items. These features are categorized as hardscape, or non-living, and softscape, or living, items. You need to place workable paths, for example, for circulating through the space; plan around where resources, like water, are that will be used regularly; and utilize the exposures for growing certain kinds of plants. Using your base plan, create a bubble diagram that sites these items. First locate the features that require a particular exposure, and then work around those. Refer to your wish list, and use the process of elimination in deciding what you can create in your space. Identify any leftover space, where beds and lawn could be placed. Draw lightly with pencil so you can easily erase what doesn’t end up working for you.
You should now have a workable base plan. Good design doesn’t happen overnight. Take time to think through these elements, and you’ll arrive at a successful chicken-friendly garden for your space.
The Chicken Infrastructure
Planning the infrastructure for the chickens is a significant part of your garden design. And placing the chicken coop on your site may be one of the most important decisions in your garden plan.
The Chicken Coop
As a structure, the chicken coop is the first of the hardscape items that you will usually place on your plan. Your chickens will be more comfortable if their coop is positioned well, your neighbors will appreciate it, and you will have an easier time working in and around the coop. Following are some considerations in picking out a spot for the coop:
– The law. First, check your community, city, or county code to learn whether there are any restrictions on placing animal housing on your property. You don’t want to go through the effort and expense of building a chicken coop and then find that the city (or the neighborhood association) will make you move it 4 feet over. And don’t assume no one is watching, because neighbors you’ve never met down the street could register a complaint. Some cities require that the coop be a specific distance away from any houses, your own and your neighbors’, which may narrow down where you can put it. The code sometimes requires a chicken coop to be located 10 feet or more from all buildings, property lines, and streets.
– Exposure and climate. You want your ladies to have a cozy spot to call home, located where they get plenty of natural light but also where they are protected from harsh weather conditions like heat, cold, or wind. Chicken coops should not be placed in areas where water will collect, such as at the bottom of a hill, or in areas with saturated soils. Ideally, the soil in the coop area should be well drained and receive direct sunlight for at least part of the day. Areas that are too exposed could get cold winds in the winter months, and could get too much heat during hot times of the year. Having a shady retreat is important for chickens during summer months. By simply placing a deciduous tree near the coop, they will benefit from the leaf coverage in the hot summer months but will get light in the winter when the leaves have fallen.
– Accessibility. Some chicken keepers choose to site their coops close to the house where they can have easy access, and others tuck them away into the back corner of the garden. Just be sure that you place your chicken coop where it is easily accessible for you. You don’t want to put it too far away, so it is out of sight and out of mind; the coop could easily be neglected if you are not reminded of it daily. Amenities like running water and power may be huge factors in where you site the coop, because running back and forth with heavy water buckets can make chicken chores a daunting task. For electrical access, it is always nice to plug into an existing outlet rather than create a new one or use extension cords, so if there is a plug on the outside of an existing building, try to utilize that.

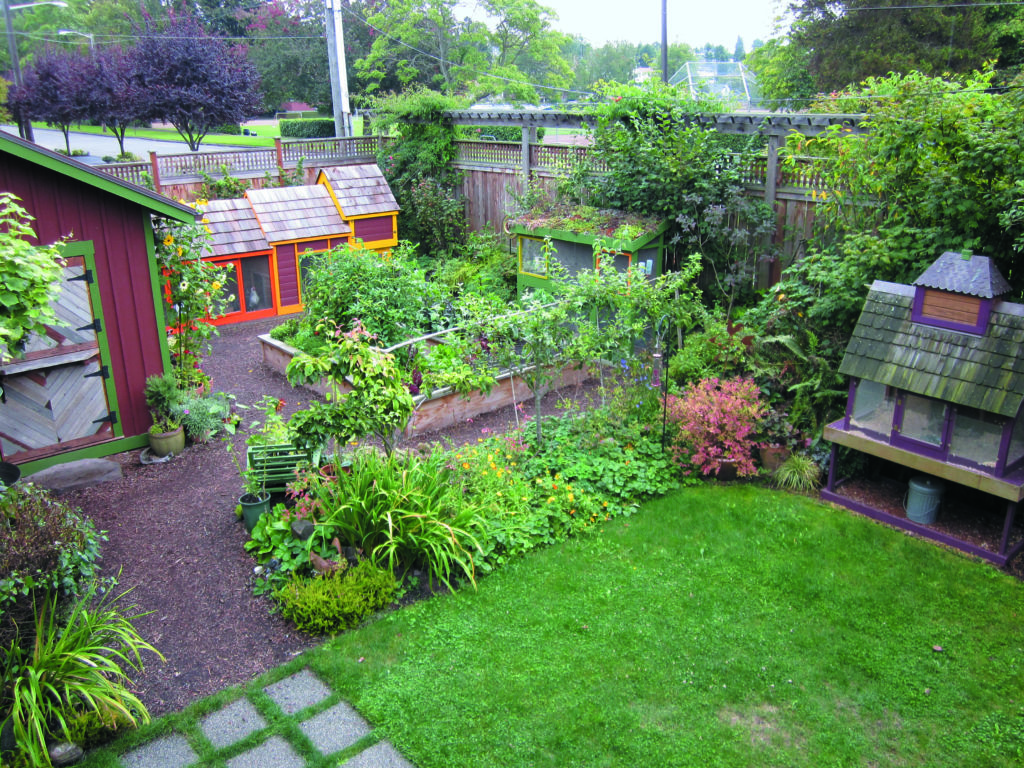
The coop is sited well in Jennifer Carlson’s garden—close to the compost and near the shed.
The Chicken Run
A chicken run is the permanent or temporary area usually adjacent to the coop that gives the chickens outdoor access to fresh air, sunlight, and earth. In many backyards, it is a permanent area that is undercover and has deep mulch bedding. It may be a moveable temporary fence system, with portals and tunnels to get chickens from their coop to the run area, which you rotate throughout the garden. Or it may be multiple runs that are divided by cross-fencing that allow you to rotate the chickens through different areas at different times of the year.
Chicken Paddocks
If you choose this system, it’s best to equally divide a space into four or five areas with cross-fencing for runs, so you can rotate the chickens through the garden at different times of the year. This method allows one fenced area to recover after chickens have grazed in it for an extended period of time. Different types of plants can be grown within the paddocks, and if planned well, certain crops can be grown so that the chickens are grazing at times of the year when the crop is least sensitive. For example, blueberries or raspberries are a plant that chickens can graze underneath and around for most of the year, but during harvest in the summer, you can put the chickens in other paddocks with plants that you are not harvesting.
The plant selection for your chicken-friendly garden paddocks will largely depend on your growing season and how many chickens you keep. As long as there is some sort of forage and plants for shelter, your chickens should be happy and safe in a confined-range paddock system.
Permanent Fences
Drawing possible fencing lines out on paper and stringing up some lines are good ways to visualize fence structures before actual building. Also, if you are unsure where permanent fence lines should be, consider using temporary fencing until you figure it out. Perimeter fencing along property lines should be straightforward enough, but when you start putting in cross-fencing you need to plan for gates and good circulation through the space.
The Compost Area
In some communities, you can simply put chicken manure and bedding into a green recycling bin and let the utility company haul it away with the rest of your green debris. But for gardeners, it is wasteful to discard such rich material. Chicken manure is one of the major benefits of keeping chickens, so planning a composting system should be a priority.
The size of your compost area will depend on a few factors, such as: How many chickens do you keep? What kind of bedding system do you use? Do you have a lot of other green materials to add to the compost pile? At what times of year do you add that biomass? Most
urban or suburban residential lots need one or two composting bins approximately 3 feet by 3 feet by 3 feet, or 1 cubic yard. I prefer to use two bins so I can rotate the material from one to the other. There are many ways to compost and many bin styles you can use, whether it is purchased or a do-it-yourself system.
The closer the compost area is to the coop, the easier it will be for you to use. If it is on the other side of the garden and less convenient to get to, it’s less likely that you will use or maintain it on a regular basis. Some considerations in placing your compost system are:
– Check local regulations for any restrictions.
– Compost bins should be placed in an area that does not collect water such as a low spot or an area with poorly drained soil.
– Compost bins should not be placed directly up against a fence, a tree, or against any wooden structures, because this can rot the wood and make access difficult. By allowing the air to flow all the way around the compost bin, you will also have more uniform compost.
– Consider the rainfall and climate. If the compost bin is near an eave that directs rainwater, it can lead to saturation and anaerobic conditions in the pile. If it is in full sun and exposed to wind, the compost may dry out quickly and need additional water to keep it moist.
– Most composting systems are not pretty and can be easily camouflaged. Consider the angles at which the composting area is visible: Is the system adjacent to the patio where you entertain? If that is your only option, you may want to consider concealing the system with a screen or plantings.
Taken from Free-Range Chicken Gardens© Copyright 2012 by Jessi Bloom. Published by Timber Press, Portland, OR. Used by permission of the publisher. All rights reserved.


