By Krislee Johnson
Over the past year, my coop has evolved with the seasons. During the first year I quickly learned what might have worked for the summer didn’t work well for the winter.
Because my coop and pen areas are in 3 parts it allows me plenty of flexibility. The coop is for sleeping & egg laying, the covered pen is for eating, drinking & lounging. The uncovered kennel offers shade and wind break along with additional water, occasional kitchen scraps and a little fresh grass under their feet. For the most part, my flock free-ranges every day, 12-14 hours total. However, with my 3-part setup I’m ready for inclement weather no matter the season.

SUMMER
During the summer season the management of my coop setup and cleaning methods are as bare bones as it gets. After having a couple summers under my belt I’ve found that taking a minimal approach works best.
For starters, my coop has a cement floor which makes for easy cleanup during the hot, dry months. Excrement from their nightly roost can easily be shoveled up each morning. Not only does this keep flies down, it also allows for clean fertilizer collection to deposit in my gardens.

I tend not to use wood chips of any kind on the floors during the warm months. Debris on the floor will only hold in moisture and become a breeding ground for pesky flies. Not only that, it would be a waste of money as I tidy the coop each morning. I’d rather not put down flakes or chips only to shovel and compost them the following day.
The nesting boxes receive a generous amount of wood chips every couple of weeks. These areas are kept clean and comfortable for my egg laying hens. The addition of wooden eggs keep my new pullet’s attention as to the purpose of the boxes. It can be very tempting for them to sleep in such comfortable quarters.
From time to time I do add a few accouterments to the coop to prevent pests. Diatomaceous earth sprinkled on the floor and in the bottom of nesting boxes minimizes the possibility of lice or mites. Essential oils such as lemongrass, lavender or citronella helps keep things smelling fresh in the heat. A few drops on roosting bars and the bars in front of the nesting boxes are sufficient.
Lastly, ventilation is key. No matter the season this functionality within your coop is important. During the long hot summer the roof vent simply wouldn’t be adequate. My husband and father-in-law created a fabulous hardware cloth screen door. This allows the coop to remain ‘open’ and secure all throughout the day and nighttime hours. A nice cross-breeze with the chicken access door keeps the air circulating quite well.

AUTUMN
As the weather starts to cool down so does the coop. Doors that were once kept open nightly, start to be closed as the sun goes down. Nothing else within the coop changes until the snow starts to fly. Never the less, autumn is the perfect time to prepare for harsh winter weather.
In preparation for snow and ice the covered pen will undergo a slight transformation. Rolls of plastic are secured to the outside walls using staples and furring strips with nails. This prevents snow from entering this area. It also holds out brisk winds and helps retain the sun’s heat. By sealing off the pen from the elements, this will give the chickens a larger area to live in during times of deep winter snow.

Flooring also comes to the forefront as chickens start spending more time indoors. Cubes of pine shavings are purchased in preparation for the birds to move inside. You can choose either fine or flake style pine shavings. Whichever you choose, make sure you have sufficient stock to layer a good 4-6 inches minimum on the floor of your coop.
At this time of year, one must also think about feeding and watering changes. Narrow down a plan to keep the feed out of the coop. This will force your birds to venture outside – even if only to a covered pen. Luring birds outside of the main coop will assist in reducing the amount of fecal matter in your floor litter. Keeping the food outside can also make your coop less attractive to mice or rats.

Freezing temperatures here in the north require special equipment to provide chickens water. It is a good time to clean and prepare fountain warmers and their associated electrical plugins. If you experience bitter temps, this may force you to place drinking water inside the coop. In a case such as this, a splash pan can catch errant drops of water and also serve as a protective insulator between a heated watering base and the pine shaving floor.
WINTER
Once freezing temperatures set in and the snow starts to pile up your birds will be inside more often than not. Big changes occur in my coop around this time and it revolves around keeping the environment dry and healthy. The time to start the deep litter method has begun.

After sprinkling clean coop floors with diatomaceous earth (DE) a generous layer of pine shavings is added. Because my coop has a very shallow floor pan I start with 4-6 inches of pine flake. This will compress over the course of the winter with new flake added each week to keep things fresh. Feces are collected with a small hand shovel or scraped off the collection boards below the roost bars.
Ventilation is very important to keep moisture at bay. During the winter, the chicken access door and the roof vent help circulate the air. If you have too much ammonia build up it is an indication that something is amiss. Check for areas of water leakage around your drinking fountain and remove wet litter.

**Important** Just because it is cold outside, a coop still needs fresh air. Your chicken’s feathers will keep them warm but nothing can keep them from breathing bad air. Ammonia build up can be harmful to your chicken’s lungs and overall health. Resulting humidity can also make your birds more susceptible to frostbite and the inability to retain heat.
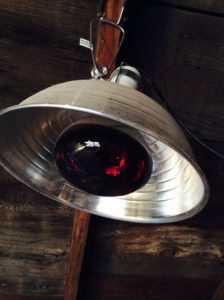
If you are worried about heat in extreme northern climates there are a few options. Consider wall insulation, a heat lamp, a lightbulb, a wall heater or a seedling grow mat. Even the deep litter method will begin to generate heat as the winter progresses. Just be sure to do your research and use caution when adding heat to dusty, wood chip filled areas.

**Helpful Tip** When using any form of heat use a thermostat where possible. Plug-in timers work great when combined with lightbulbs or heat lamps. I’ve used them to regulate temperatures by turning on and off heat lamps throughout the night.

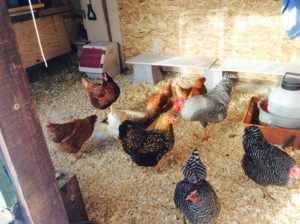
As for my covered pen area, I prepare it similarly to my coop. I treat the dirt floor with DE, rake and sprinkle only 1-2 inches of pine shavings in this area. The birds will scratch, peck and dust bathe in this enclosure. The pine shavings generally pile up in a corner where they like to nap. I limit the shavings out here to keep mice from nesting while using just enough to keep things dry.
SPRING
Ah, sweet spring! By now you are probably itching to clean the coop. Once the threat of cold weather dissipates, your coop and the poop will start to thaw. If not taken care of, things will get smelly indicating the time has come for spring cleaning.

Start with removing, cleaning and storing all winter gear such as heated water fountains and drip pans. Drinking water can now go back outside where it belongs.
Removal of the compacted deep litter within the coop is imperative. Don’t be afraid to glove up and use a good quality mask, this part isn’t pleasant. Once removed you can rinse or wash out your coop and allow it to dry thoroughly.
If you detect any pest issues such as mites or lice in your flock, treat your coop and your birds. You can use poultry approved sprays, bleach, permethrin dust or DE. Again, whatever you choose just make sure the area is allowed to dry and air out completely.
At this point I would treat my outside covered pen in much the same manner. I remove the bottom portion of the plastic sheeting to allow for air flow. I shovel out, rake and sprinkle DE around the entire area. In general, I clean up any messes or compacted matter thawing out from the long winter. As temperatures reach a consistent 40-50 degrees Fahrenheit, the remaining plastic is removed.
CUSTOM COOP CARE
Just because some of these options work best for me doesn’t mean they will work best for you. It is important that you cater to your particular flock’s needs according to the space you have available and the climate. As with any learning experience, flock care and coop maintenance needs vary. Don’t be afraid to customize your poultry living quarters by finding what works best for you!
#LifeOn25Acres


3 Comments
As a first timer of backyard chickens this was filled with great info as the cool weather is begining to set in and I need to prepare for the up coming winter. Thank you for the great advice and tips
This was a great article. I am think about getting my own chickens and am looking at all the variables before I get started. This article had valuable information for me due to the Oklahoma weather. thank you.
Thanks so much for the kind words. I’m just entering my second season with my chickens and I’m loving every minute of it. It’s amazing to look back and see just how much I’ve learned. Community Chickens is a great resource!