Nurture your nascent covey in this cozy hand-built brooder box by Kelly Bohling. All photos by author.
Getting Started and Re-Purposing
I’ve used several homemade brooders for brooding and raising quail over the years. Storage tote models work well, especially if you’re just starting out. After brooding several generations of chicks, though, I decided to design a sturdy, durable brooder guided by the experience I’ve had with other setups. In designing this homemade brooder, I considered ease of access for cleaning, options for heat lamp placement, security from potential predators, and price. After buying new lumber, hardware cloth, and paint, the project cost about $100. However, repurposing or sourcing used lumber, hardware cloth, and paint would greatly reduce this cost.
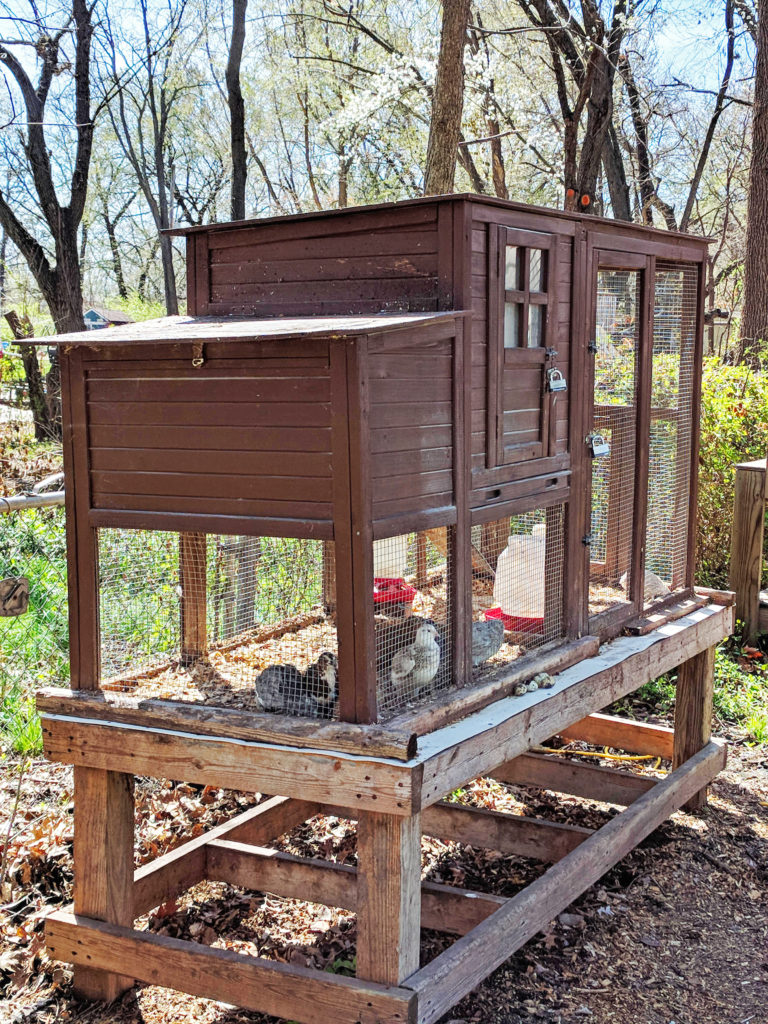
After they are large enough, this is the house they’ll live in. Read about housing your quail in Housing Coturnix Quail.Before constructing the brooder, there are some details regarding materials you should consider. While cedar boards might seem tempting, this aromatic wood isn’t suitable for quail or other fowl. It can cause respiratory problems and is best avoided. I would also strongly discourage using treated lumber. I chose to use both PVC-coated and galvanized hardware cloth. I envisioned the heat lamp resting directly on the hardware cloth on the lid in the early days of brooding to keep the chicks warm, so I wanted to avoid direct contact between the lamp and the PVC-coated hardware cloth. Therefore, the galvanized hardware cloth is used exclusively on the lid. On the other hand, PVC-coated hardware cloth is perfect for the floor of the brooder, to help keep it clean and make cleaning easier. Mold- and mildew-resistant primer is best. Any low- or zero-VOC (volatile organic compound) paint is ideal, and I highly recommend semi-gloss or high-gloss to make cleaning easier.
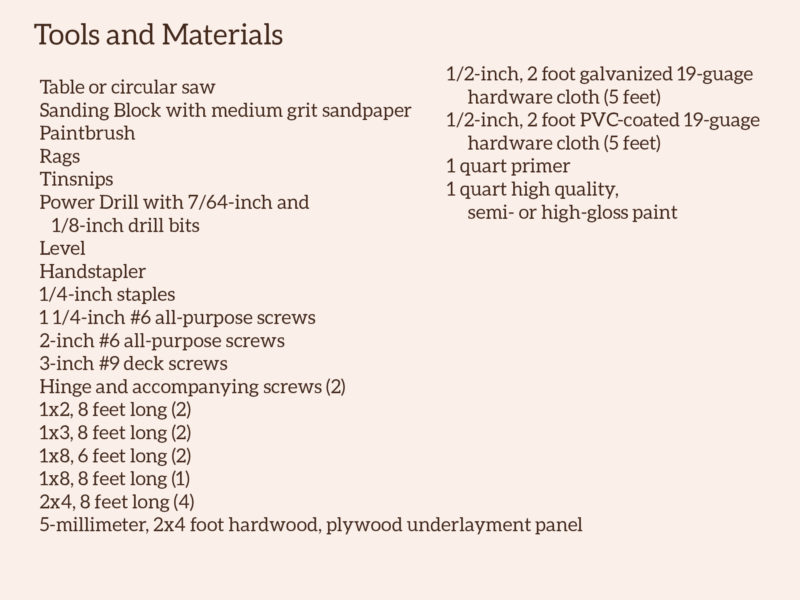

Quail, Assemble!
With the sanding block, smooth any rough edges or splintered places along the length of the cut pieces. Wipe the sanded pieces with a dry rag to remove residual dust.


Next, paint every piece (including the hardwood underlay and 73½-inch-long 1×2 remainder) with primer, making sure to avoid drips or excess that will affect how the pieces eventually fit together.
When the primer is dry to the touch, apply a coat of paint, still being careful to avoid drips. Let the paint cure according to the manufacturer’s instructions.

Lid
The first step is to construct the lid of the brooder, which is made up of 1×3 boards. The lid is made of two frames, with the galvanized hardware cloth sandwiched between them. On a level surface, lay out the two 27-inch boards and two 34-inch boards that will make up the first lid frame. The 34-inch boards will sit inside the 27-inch boards. Then, lay out the two 22-inch boards and two 39-inch boards that will make up the second lid frame. For this frame, the 22-inch boards will sit inside the 39-inch boards. While both frames yield the same dimensions of 39 by 27 inches, the arrangement is offset to give added strength.
Staple the joins with the hand stapler, using ¼-inch staples. This is only to hold them temporarily.

Next, staple the galvanized hardware cloth to one frame, using the same ¼-inch staples. Line up the 2-foot side of the hardware cloth with the short end of the frame, and then center the edge of the hardware cloth on the board, so the cut ends will be completely hidden once it’s sandwiched between the frames. Staple the hardware cloth down every few inches across this board. (I try to staple diagonally across the intersection of wires to avoid possible movement later.)
 Unroll the hardware cloth down the length of the frame, keeping moderate tension on the roll and stapling it every few inches on each side, making sure to keep it taut across the opening. When you near the end of the frame, measure 1½ inches in from the edge, cut the hardware cloth with the tin snips to this length, and finish stapling.
Next, line up the second frame on top of the first. The hardware cloth should be sandwiched between the frames.


With the frames aligned, use the 7/64-inch bit to predrill four equidistant pilot holes into the long sides of the top (unattached) frame and two or three into the short sides. Using the 1¼-inch #6 screws, screw the frames together. Flip over (now with bottom frame on top) and predrill pilot holes in the corners to reinforce, using the same bit and screw sizes, to complete the lid.
Brooder Box
The brooder box itself is made by stacking two shallow boxes, which I’ll refer to as the top and bottom boxes. The quail will have approximately 14 inches of headroom, which is roomier than many commercial brooders. Lay out the 1×8 boards in two sets of two 36-inch boards and two 22½-inch boards. The longer boards will go on the outside, the shorter ones inside. Taking care to keep each corner at a 90-degree angle, stand the boards on edge and predrill three equidistant pilot holes on the outside corners with the 7/64-inch bit. Assemble with 1¼-inch #6 screws.

When both boxes are assembled, designate one of them as the bottom box. You’ll attach the PVC-coated hardware cloth to this box. Staple the 2-foot side of the PVC-coated hardware cloth to the short side of the box. The hardware cloth and box edge need to be flush to achieve maximum strength. Staple every few inches across the short side. Unroll a few inches at a time down the length of the box, maintaining moderate tension and stapling every few inches on each side. When you get to the other short end, staple across and cut off the remainder with tinsnips, making sure the edge is flush with the box edge.
Locate the four 1x2s; these will act as trim reinforcements to help support the floor. Stack the 1x2s on top of the 1x8s (see “Aligning Floor Trim” photo). Use the 7/64-inch bit to predrill four equidistant pilot holes through the sides of long 1x2s and three into the short ones.

Align the edge of one long piece flush with the edge of the box and attach it with 2-inch #6 screws. Attach the short pieces next, and end with a long piece to ensure a snug fit.

Legs
Next, assemble the legs. There will be four leg units, each made from two 4-foot 2x4s attached to each other at a 90-degree angle. Support the free edge of the top board with a scrap 2×4 to stabilize the work during this step.


Predrill four equidistant pilot holes down the length of the top board with a 1/8-inch bit. Screw the boards together with 3-inch #9 screws, making sure to keep the edges and ends flush.

Assemble the remaining three leg units in the same manner.
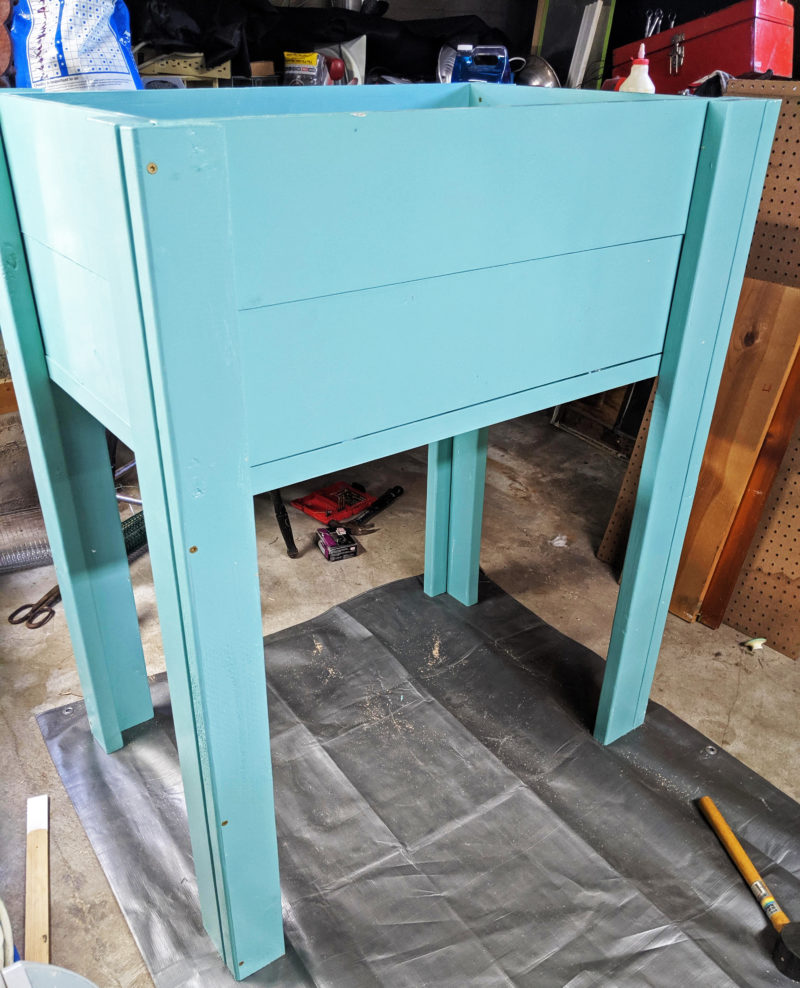
Attach the leg assembles to the four outside corners of the top box (the box without the floor). Align the tops of the legs with the top of the box to avoid a gap when the lid is closed. This step is easiest to do with two people. While one person holds the top box level, the other can align a corner of the box with the L shape of the leg. Using the 7/64-inch bit, predrill two pilot holes from inside the box into the leg, and attach with 2-inch #6 screws. Attach the second leg on the opposite corner, checking the top of the box with a level. Attach the remaining two legs in the same manner. Maneuver the bottom box, with the mesh floor facing down, directly beneath the top box, making sure the edges are flush, to form a single, tall box. Connect the bottom box in same manner as the top box (predrill two pilot holes from inside the box into each leg, and attach with 2-inch #6 screws). At this point, the box, floor, and legs are complete.
Hinges
Place the lid flat on top of the box unit, lining up the outside edges of the lid with the outside edges of the legs. Decide which side of the brooder will be the back, and then install one hinge centered on either leg on that side.
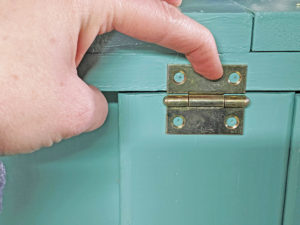
Predrill appropriately sized pilot holes for the accompanying screws, and attach hinges to lid.
Drop Board
The unit is usable at this stage. Droppings will fall to the floor or into a chosen receptacle. Because I intended to use mine inside, I designed a “drop board” that I cover with newspaper to catch droppings, and change as needed. If you choose to do the same, you’ll need to install supports for the drop board. Starting 12 inches off the floor, measure the distance between the inside corner of one front leg to the inside corner of the opposite front leg, and repeat between the back legs. (These measurements may not be exactly 36 inches, which is why I recommend waiting until this point to cut these pieces.) Cut the remainder of the 73½-inch 1×2 to length, and install by predrilling a pilot hole at each end with the 7/64-inch bit and attaching with 2-inch #6 screws.


Place the 2-by-3-foot plywood drop board on top.
In the early stages of brooding, you may still need to line the floor with paper towels to keep the chicks’ feet from going through the mesh, but as the quail get a bit older, you can allow them to stand directly on the wire floor. Provide them with a board or box to occasionally get off the wire. If desired, the brooder legs can be removed for storage. The high-gloss paint and coated hardware cloth floor will allow for easy cleaning once the chicks outgrow the brooder, and the primer will further limit potential mold or mildew issues from spilled water.
Kelly Bohling is a native of Lawrence, Kansas. She works as a classical violinist, but in between gigs and lessons she’s out in the garden or spending time with her animals, including quail and French Angora rabbits. Kelly also spins the Angora fiber from her rabbits into yarn for knitting, which can be found in her Etsy shop, ThreeRabbitYarns. She enjoys finding ways that her animals and garden can benefit each other for a more sustainable urban homestead. You can also follow her on Instagram.


