Nest boxes, hidey-holes, dust baths, learn how to make quail “furniture” with Kelly Bohling. Photos by author.
In my years of keeping Japanese quail, I discovered that these birds always enjoy two pieces of “quail furniture”: a shelter to hide in, and a good dust bath! I also learned that whatever quail spend a lot of time in will potentially get dirty with droppings, so use a high-gloss paint on the furniture pieces to make them easy to clean and to repel moisture.
Dust Bath Box
The dust box is made of two boxes that nest one inside of the other. The larger outer box has a solid plywood floor, while the smaller box has a hardware cloth floor. What I intended with this design was for the hardware cloth to sit well below the dust bath contents, and when it would become dirty with detritus and droppings, I could lift the inner box and essentially sift out the unwanted material. This is made easier with the addition of finger holes in the inner box.
Tools and Materials
8′ long 1″-by-3″ common board (1)
Cut 2 of each of the following dimensions:
8-1/2″
10″
10-1/4″
11-3/4″
Sandpaper and sanding block (120 grit or so)
Power drill with 3/32″ drill bit and 1/2″ drill bit
#6 1-1/4″ wood screws
Power driver with correct screwdriver bit for #6 screws
3/8″ plywood, large enough to cut a 1-square-foot piece
Saw of choice (to cut 1″-by-3″ boards and plywood)
Sawhorses
Either a high-gloss paint-plus-primer, or primer (such as Kilz) and high-gloss paint
Paintbrush
1/4″ hardware cloth (either galvanized or coated will work)
Tinsnips (to cut hardware cloth)
Stapler gun and T50 1/4″ (6 mm) staples
Assemble the Dust Bath Box
Take the 1-inch-by-3-inch boards that have been cut to the four different dimensions listed above, and smooth any rough edges with the sanding block. Lay out the two 8-1/2-inch boards between the 10-inch boards to make a square, with the 10-inch boards outermost. Pre-drill two equally distanced holes at each corner with the 3/32-inch drill bit. Then, use two #6 1-1/4-inch screws to secure each corner. This will be the smaller inside box.
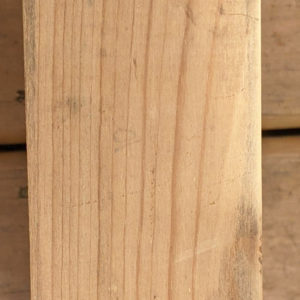
- Short side of dust box.
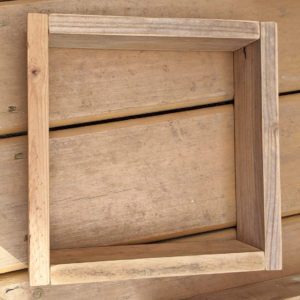
- Small dust box assembled.
Place the 10-1/4-inch boards between the 11-3/4-inch boards to make another square, with the 11-3/4-inch boards outermost. Pre-drill two equidistant holes at each corner with the 3/32-inch drill bit, and secure each corner with two #6 1-1/4-inch screws. This will be the larger outer box. Make sure that the smaller box can easily fit inside the larger box.
Mark out the Floor
To mark out the floor for the dust bath, use the larger of the two boxes as a template, and trace its outside dimensions onto the 3/8-inch plywood. With your preferred saw, aim for just inside the marked line as you cut out the floor. This will help ensure no protrusion from underneath the box when assembled. With the sanding block, smooth the edges and any rough areas on the surface.
Arrange this floor piece on top of the larger box, and be sure the edges are aligned and flush with the box sides. With the 3/32-inch drill bit, pre-drill three holes through the floor and into the 11-3/4-inch walls, and two into each smaller wall. Secure the floor with 10 #6 1-1/4-inch screws. Make sure the screws are flush, or even slightly countersunk. This will keep the box from snagging when moved in the coop.
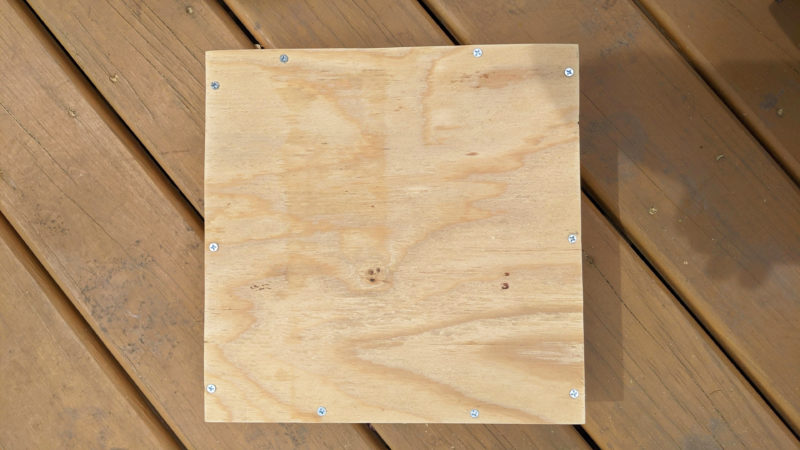
Floor of the dust box.
To make the finger holes, take the smaller box and mark the approximate lengthwise center point on each of the 8-1/2-inch boards. With the 1/2-inch drill bit, drill a hole slightly higher than widthwise center. Go slowly and don’t apply too much pressure while you drill to avoid splintering around the hole. Wrap a strip of sandpaper around your finger and smooth the inside and edges of each drilled hole.
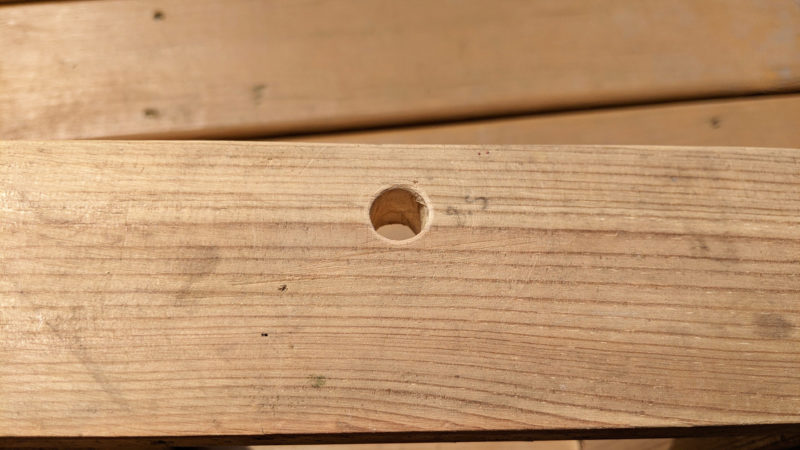
Finger holes for dust box.
Time to Paint
If you’re using primer, apply a generous coat to all surfaces, and allow it to cure completely, according to the product’s directions. Follow with a coat of high-gloss paint, being sure to coat the floor and inside of the boxes generously. I went with a high-gloss paint marketed as a “paint and primer,” and applied a generous first coat all over, and then applied a second coat on the plywood floor and inside of the boxes for additional protection from moisture. Don’t forget to paint inside the finger holes.
Once the paint is dry, it’s time to add the “sifting” floor to the smaller box. Roll out a portion of the 1/4-inch hardware cloth, and place the smaller box on top. Line up two of the box edges with a corner of the hardware cloth, and cut the two remaining sides of hardware cloth slightly smaller than the outer dimension of the box. With the staple gun, staple the hardware cloth to the bottom of the smaller box every 2 inches or so, being careful not to staple too close to the edge and split the wood.
The dust bath box is complete! I like to use wood ash, sand, and a little dried dirt (free from chemicals and fertilizers) for my quail dust baths.
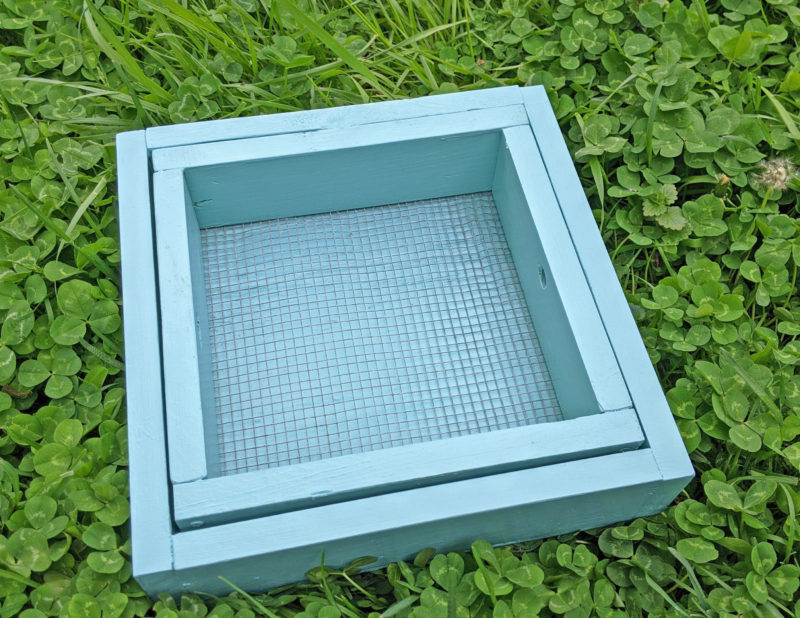
Finished dust box with hard wire floor in the inner box.
Shelter Box
Quail love to hide away in the undergrowth or thickets in the wild, and domesticated quail appreciate a hide-away shelter too! This shelter box has two solid walls, two walls with doorways cut into them, and a roof piece. All are cut from 3/8-inch plywood and framed with four 1-inch-by-2-inch pieces in the inside corners. Outer dimensions of the finished shelter box are 10-inch-by-14-inch and 8-3/8 inches high.
Tools and Materials
3/8″ or 1/2″ plywood (This is a great project to use up small leftover pieces!)
1″-by-2″ furring strip board (usually sold in 8′ lengths), cut into four 7-3/4 inches lengthwise
Power drill with 3/32″ drill bit, plus drill bit for jigsaw entrance points
Jigsaw (for cutting out doorways)
Saw of preference (cutting out walls and roof from plywood)
Sawhorses
Sandpaper and sanding block (120 grit or so)
#6 1″ screws
Power driver with correct screwdriver bit for screws
Primer and high-gloss paint, or high-gloss paint-plus-primer
Paintbrush
Begin the Shelter
To begin making the shelter box, mark out pieces of the following dimensions on the plywood:
8-inch-by-9-1/4-inch pieces (short walls) (2)
8-inch-by-14-inch pieces (long walls) (2)
10-inch-by-14-inch piece (roof) (1)
On one of the 8-inch-by-9 ¼-inch pieces, mark a doorway 5 inches high and 3 inches wide, approximately centered. On one of the 8-inch-by-14-inch pieces, mark two doorways, approximately equidistant, and of the same 5-inch-by-3-inch size. Drill holes in each of the four doorway corners, trying to align as much with the markings as possible. Cut out each doorway with the jigsaw, using one drilled hole as an insert point for the jigsaw blade, and the following three for relief/pivot points, until you have finished the cut. Once doorways are cut out, use your saw of choice to cut out the 5 plywood pieces (four walls and one roof piece). This order of cutting doorways first and walls second will reduce the risk posed by cutting out doorways while holding/securing a small piece of plywood.
Sand It and Support It
With the sanding block, smooth all edges and any rough surfaces. Pay special attention to the doorways themselves, as they need to be free from any splintered or rough edges so that quail can pass through.
Then, take one of the 1-inch-by-2-inch boards (cut to 7-3/4 inches), and align the narrow edge with one of the 8-inch-by-9 1/4-inch wall pieces, along its 8-inch edge. Make sure the end of the 1-inch-by-2-inch is flush with one of the wall’s 9-1/4-inch sides. The 1-inch-by-2-inch brace won’t meet the end of the opposite side. This design will help the shelter box nestle into pine shaving bedding or grass.

Shelter box wall.
With the 3/32-inch drill bit, pre-drill 2 equidistant holes through the wall, into the 1-inch-by-2-inch piece. Secure with two #6 1-inch screws.
Repeat with a second 1-inch-by-2-inch board on the opposite 8-inch side.
Repeat these steps with the second 8-inch-by-9 1/4-inch wall piece and remaining 1-inch-by-2-inch pieces.
Add the Finishing Touches
Take a 10-inch-by-14-inch wall and align it with both 8-inch-by-9-1/4-inch wall pieces, so that the wide edges of each 1-by-2-inch board lie against the inside of this longer wall. The shorter plywood walls should be flush with the edges of the longer wall, with no gaps. Using the 3/32-inch drill bit, pre-drill two holes equidistant down the lengths of each 1-by-2-inch piece. Secure with two #6 1-inch screws on each side. Repeat with the fourth wall. You should now have a box with two walls that have doorways, and two that don’t. This creates a sheltered corner in which the quail can potentially use as cover from the wind, if needed.
Align the roof piece on top of this box, taking care that the edges are flush. With the 3/32-inch drill bit, pre-drill holes in each corner of the roof, going into the 1-by-2-inch pieces. Secure with four #6 1-inch screws.
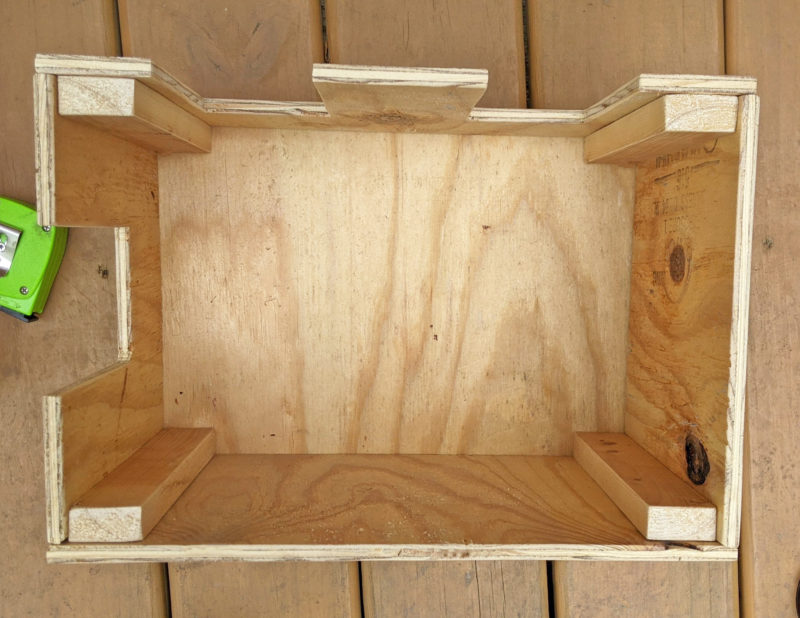
Inside of shelter box.
If you’re using primer, apply a generous coat, and allow to cure according to the product directions, and follow with a coat of high-gloss paint. I used a high-gloss paint-plus-primer for this project, applying a generous first coat and then a second coat where the bottom edges would make contact with the floor. The shelter box is now complete!
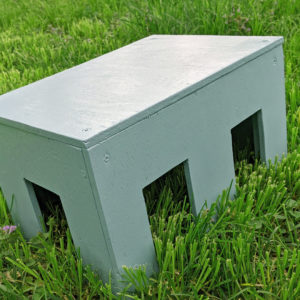
- Finished shelter box…
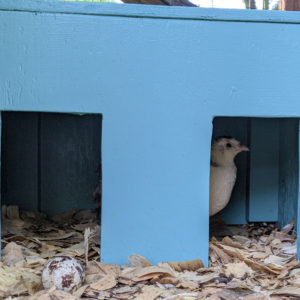
- … with quail.
These two pieces of “quail furniture” will be fast favorites in your coop. Between a dust bath and a shelter box, your quail will be quite content!
Kelly Bohling is a native of Lawrence, Kansas. She works as a classical violinist, but in between gigs and lessons, she’s out in the garden or spending time with her animals, including quail and French Angora rabbits. Kelly also spins the Angora fiber from her rabbits into yarn for knitting, which can be found in her Etsy shop, ThreeRabbitYarns. She enjoys finding ways that her animals and garden can benefit each other for a more sustainable urban homestead. You can also follow her on Instagram.

