Want to own backyard birds, but don’t have the room or time for chickens? Alexandra Douglas shows you how to acquire, hatch, and brood tiny, beautiful Coturnix quail.
Intriguing Alternative to Chickens
With the popularity of raising your own birds for meat and eggs, Coturnix quail are becoming the alternative to chickens and other fowl as the ideal homesteading bird. With an incubation time of 17 days and egg production starting within 6 weeks of hatching, you can’t go wrong with raising quail. Their eggs are high in vitamins B1 and B12, while their meat is rich with vitamins, iron, zinc, magnesium, and phosphorus. I love the special line of dual-purpose Coturnix quail that we’ve bred just for that egg/meat combination.

Beautiful male Common Quail (Coturnix coturnix) close up. Getty Images
You can raise quail by purchasing hatching eggs, chicks, juveniles, or even adults who are ready to lay. I recommend starting out with juveniles or adults for your first flock, so you can learn from them and see if quail are the right fit for you. If so, you might become interested in hatching out your own eggs.
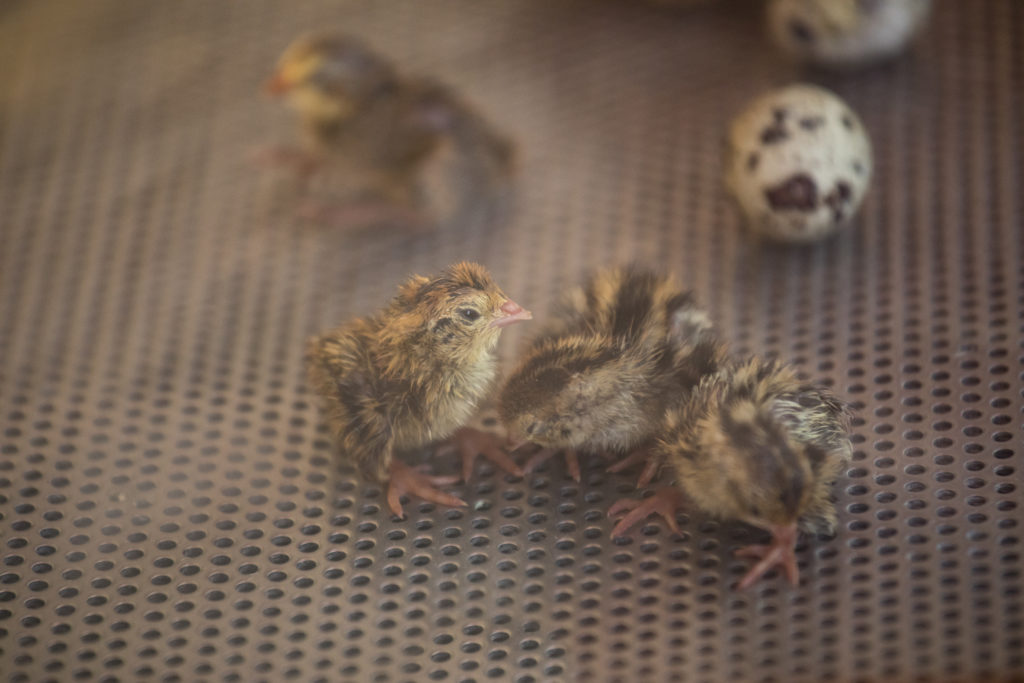
There are lots of different incubators to help you hatch out eggs. Getty Images
Many folks do start right away with hatching eggs, simply because you can get many eggs for the price of a few live birds. Some breeders sell small batches of hatching eggs (a dozen or so), while other breeders will only sell and ship large numbers of eggs.
How Do You Find Hatching Eggs?
Quail hatching eggs can be found in local ads, auction sites, or breeder advertisements. They can also be purchased and shipped from online sources. Many auction sites allow sales of hatching eggs for those wanting to incubate. I highly recommend getting eggs from a NPIP (National Poultry Improvement Plan) certified breeder, which tells you that the breeder has their birds tested for infectious diseases.
Shipping Quail Eggs is Tricky
I recommend first seeking out local producers to purchase quail hatching eggs. You’ll have a better chance of a successful hatching this way. If you’re unable to find eggs locally, then shipping may be your only option. When eggs are shipped, they can get damaged; it just takes a drop of the box to rupture the membranes of the eggs. However, many breeders are now using foam shippers, which decrease breakage. Read reviews of the breeders before ordering eggs to make sure you’re getting fresh eggs for the best possible hatch rates. Keep in mind that whether you buy local or have eggs shipped, hatching eggs is a gamble, and not all of them will hatch. In the beginning, you may see just a 50 percent hatch rate; however, over time, you’ll learn more about hatching and how best to use your incubator.
Incubator to Fit Your Needs
Hatching eggs means you’ll need to set up an incubator. The good thing is that there are many incubators to choose from based on the number of eggs you want to hatch and how much money you want to spend. I started with a tabletop Hovabator Genesis and gradually upgraded to cabinet incubators. The incubators are based on preference, but also use. Are you looking to hatch a dozen eggs or six dozen? Tabletop incubators are great for beginners with just a few eggs. With turners, you can fit up to 120 quail eggs in Styrofoam incubators. I recommend a circulated incubator (with a quail egg tray insert) that provides even airflow, rather than still-air incubators, which have hot and cold spots that will affect hatching. Quail chicks need ventilation to be able to pip through the shell and enter the world. Too little ventilation can suffocate chicks, and they can pass away quickly in the shell.
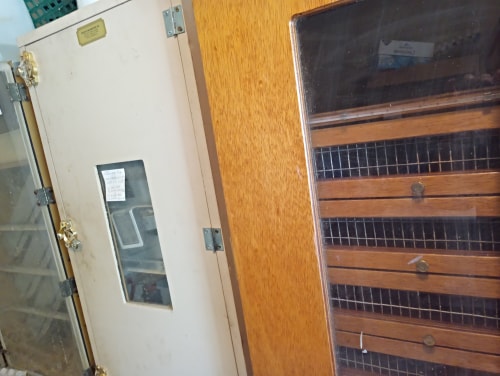
Cabinet style incubator. Photo by author.
Warm and Moist is Best
If you’re using a circulated, or forced-air, incubator, keep the temperature at 99.5 degrees Fahrenheit. Still-air incubators will need a temperature of 102 degrees F. Quail embryos will start dying when temperatures reach 105 degrees F., so having at least two thermometers (preferably with alarms) is very helpful. I usually keep the original incubator thermometer and add my own digital thermometer. A meat thermometer would work too.
Before setting any eggs in the incubator, I recommend running the incubator for at least a week to make sure it works properly and keeps temperatures stable. Once it’s heated up, you can put the eggs in the turner.
Humidity is also very important, and will be affected by your geographic location, even inside your home. Here in Florida, where outside humidity can range from 45 to 90 percent, I’ve kept the incubator humidity consistently between 50 and 65 percent for quail eggs. Everyone sets up the humidity differently to work within their goals and environment. Some climates are drier, while others are extremely wet. This is where you may need to try out different settings to figure out what humidity works for you. Too much humidity will make the embryo drown; too little humidity causes the membrane to shrink-wrap the embryo and suffocate it.
The average incubation time for Coturnix eggs is 17 days. Depending on your incubator settings, eggs can hatch anywhere from 16 to 20 days. Larger eggs may take a couple extra days.
Turning your eggs
Many incubators are designed for chicken eggs, but do have turners that’ll work with smaller quail eggs. Eggs need to be turned not just to warm them evenly, but also because it stimulates development of the vasculosa or membrane around the yolk, rich in the blood vessels (and oxygen) needed for embryo development. Turning also transfers albumen proteins into the amniotic fluid, providing nutrients for the growing chick. If you don’t have a turner, marking the eggs with an “x” and “o” will help you when you manually turn the eggs at least three times a day. The downside to turning eggs manually is that you have to open the incubator multiple times daily, which will decrease the temperature and may delay the hatch date.
Candling
Candling quail eggs is similar to candling chicken eggs. The only difference is the size of the egg, making it easier for the eggs to chill and delay hatch. By shining a light through the egg, you can check on the growth of the embryo. A small LED flashlight will do the trick, allowing you to see the embryo development. I typically candle at 7, 12, and 14 days prior to the lockdown of the eggs. “Lockdown” is when you stop the turners, about 3 days prior to hatch, but still make sure there’s enough humidity in the incubator. Then, you wait for the eggs to hatch.
Hatch Day!
Around day 17, the Coturnix quail chicks will “pip” and “zip.” If everything goes right, quail hatching is analogous to popcorn popping in the microwave. Once the first chick pecks a hole in the shell (pip) and creates a line so one end of the shell will open (zip), the others follow. It’s a remarkable sight;it’s addicting to watch quarter-sized birds hatch.
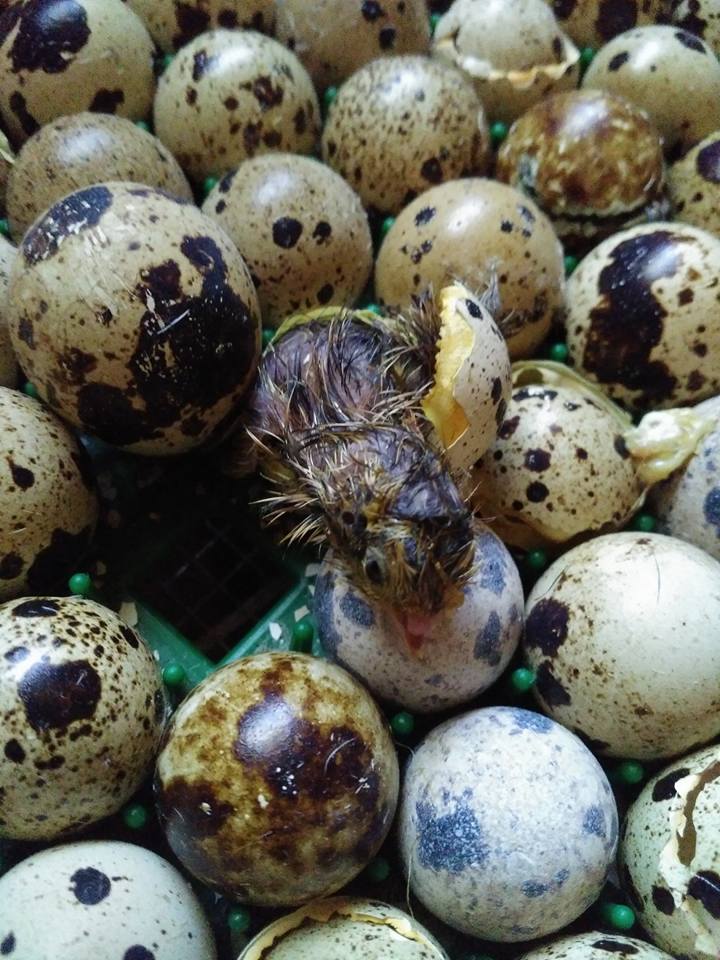
Newly hatched baby quail who just zipped open their egg. Photo by author.
Safe, Warm, and Fed
Newly hatched chicken chicks are larger than baby quail, and have just sucked down a lot of nutrients from leftover yolk and albumen. Newly hatched quail don’t have the same reserves, because of their small size. As soon as they’re dry and have fluffed out a bit (absolutely no more than 12 hours), move them to the brooder where they’ll have access to food and water.
Types of Brooders
Brooders come in many shapes and sizes, and can be bought or built. When I started raising Coturnix chicks, I used fish tanks with a heat lamp and cover. It’s important to watch for overheating with this setup, but it works well. Now, we build draft-free wooden brooders with wire bottoms for our birds. For the first 3 weeks, we put down a nonskid liner, puppy pad, or towel to keep their tiny feet safe from getting hurt by the wire.
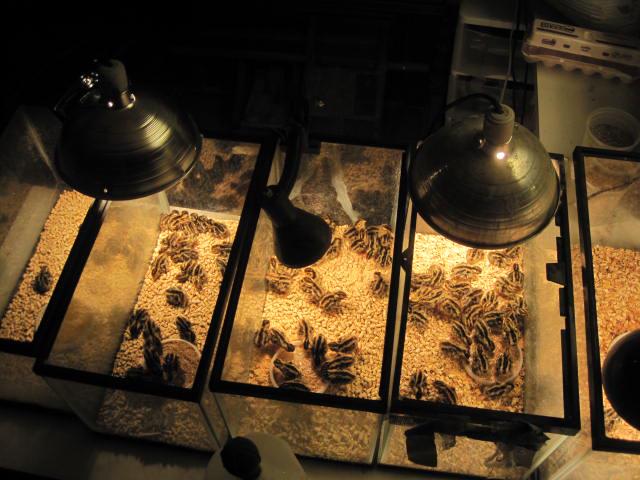
Fish tank brooders with heat lamps. Photo by author.
Some of our older brooders had solid floors, which worked just fine. Because quail chicks can eat smaller shavings, which can lead to impacted crops, we used large pine shavings to cover the floor. It’s also important to keep the flooring clean to prevent coccidiosis (a parasitic, intestinal disease caused by ingesting infected feces).
Make sure your brooders are set up in advance to make the transition from the incubator to the brooder easy for the chicks.
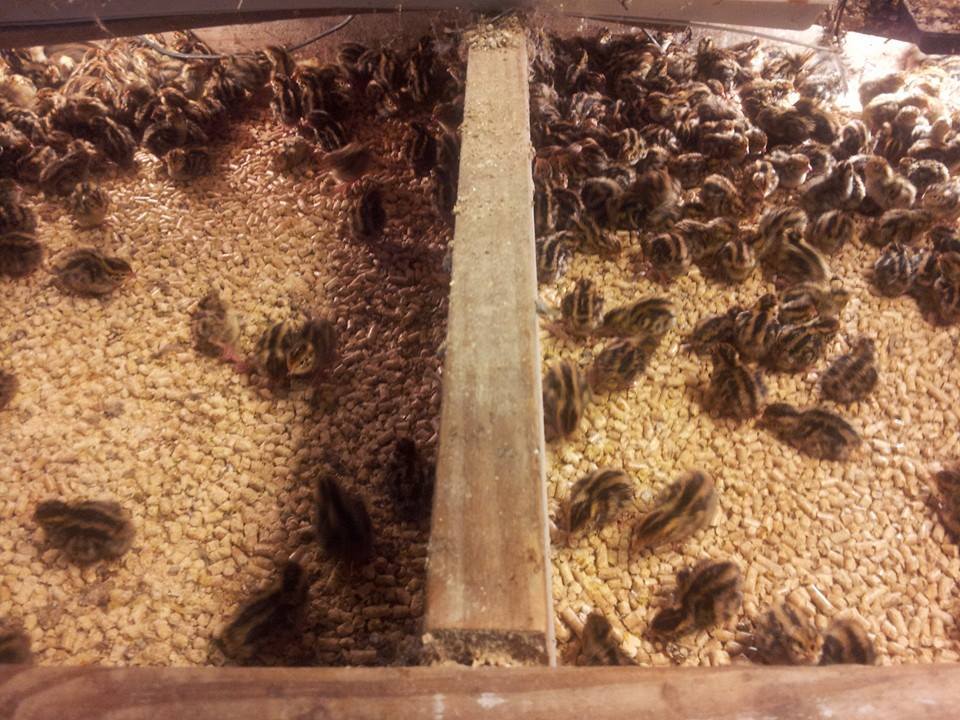
A constructed brooder with a solid floor. Photo by author.
Hot, But Not Too Hot
The summer months in Florida are hot enough that we don’t provide extra heat in the brooder for our young quail. There’s a light in their coop so they can see their food, and that gives off a bit of heat for unseasonably cool moments. If you don’t feel comfortable using a light bulb, there are many brooder warmers and heaters available. Put a thermometer in the coop so you can check ambient air temperature. Set the initial temperature of your heater at 95 degrees F, and gradually decrease by 5 degrees each week as they grow and begin to regulate their own body heat.
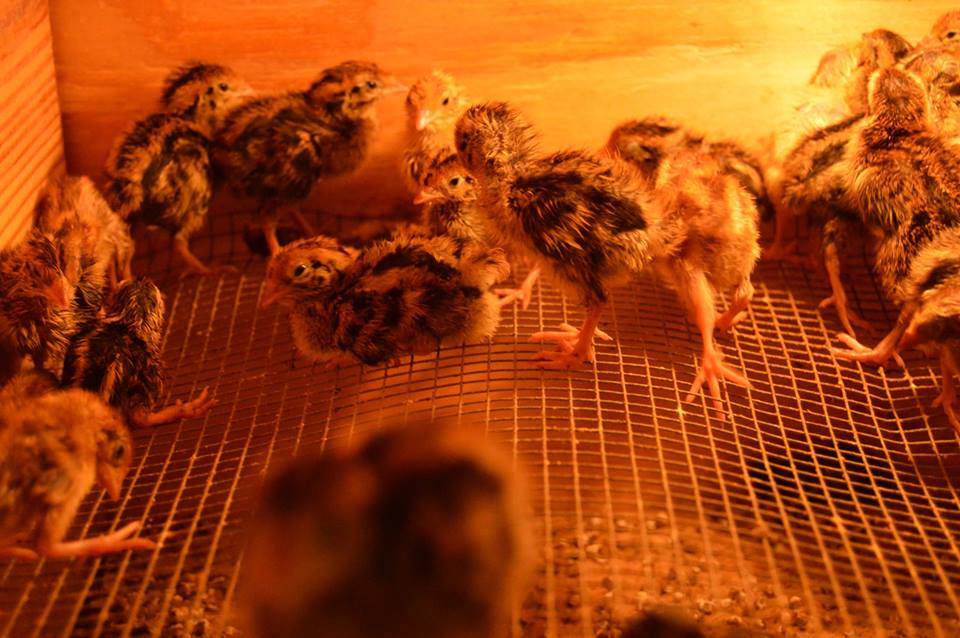
Baby quail on wire mesh floor under heat lamps. Photo by author.
You can tell if the brooder is too hot or cold by observing how the quail behave. If the birds are away from the heat, they’re too hot. If they huddle under the heat, they’re cold. They are content and comfortable if the chicks are moving around the brooder and napping anywhere.
Start Them Off with a Good Diet
Coturnix quail chicks do well with a game bird starter of at least 24 percent protein (higher than chicken starters with 18 percent protein). If their diet is too low in protein, they’re prone to cannibalism. I highly recommend a 28 to 30 percent protein mix for quail chicks. You can grind the food into a cornmeal consistency or mix it with water to create a mash. I’ve found that the mash helps the chicks digest the food easily and promotes the steady weight gain preferable for dual-purpose quail. The added water also ensures that the birds are well hydrated. Nipple waterers or mason jars with a quail base can be purchased at most feed stores.
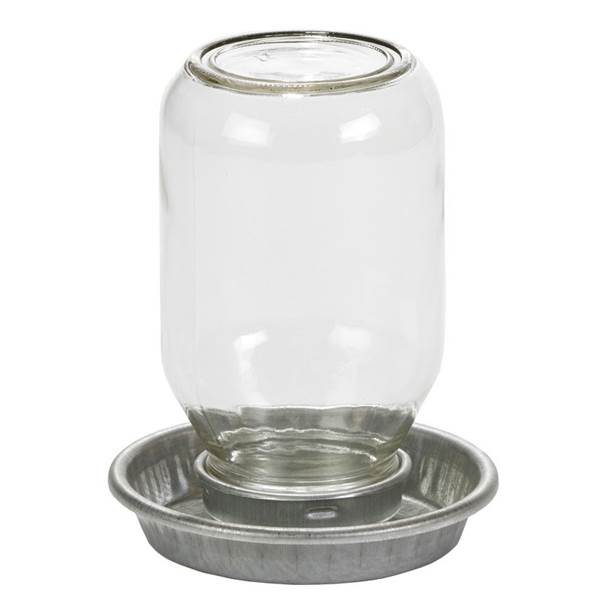
Mason jar waterer with a chick base. The chick bases are deeper than the quail bases, but you can add marbles to the chick base to prevent the quail chicks from drowning. Getty Images.
Moving Your Quail Outside
Typically, when the quail are 4 to 5 weeks old, they can be moved outside to finish growing prior to their maturation age of 6 weeks. Some Coturnix breeds are larger than others and will take longer to mature. If you live in a warm climate, chicks can be safely moved outdoors at 4 weeks, if the temperature is 80 degrees or higher. For cooler climates, the birds may need an additional heat source until they can acclimate to the colder temperatures. Once they’ve reached their full growth, adult quail tend to be quite hardy in cool weather. Hatching and raising quail chicks from eggs to adulthood is a fun and exciting experience. I highly recommend you try it if you haven’t. You’ll enjoy watching your quail develop from tiny fluff balls to beautiful, perky birds. For more details about how chicks develop in the egg and the first several weeks, please refer to my book: Coturnix Revolution.
Alexandra Douglas was born in Chicago, Illinois. At age 9, she began raising psittacines (parrots). She moved to Oregon in 2005, where she attended Oregon State University, majoring in Animal Sciences, with an emphasis in pre-veterinarian medicine and poultry. Alexandra was hooked on quail as soon as she was handed a day-old Pharaoh Coturnix. Currently, she owns Stellar Game Birds, Poultry, Waterfowl LLC, a poultry farm that sells chicks, hatching eggs, eating eggs, and meat. She’s been featured in Aviculture Europe and honored by the Heritage Poultry Breeder Association of America for her research on quail. Her book on Japanese Quail, Coturnix Revolution, is a comprehensive guide to raising and understanding these domesticated fowl. Visit her website or follow her on Facebook.


