I came up with this beginner level Heavy Duty Feed Sack Tote because my seamstress skills leave a lot to be desired! I’ll admit, as crafty and creative as I try to be, I just can’t get a handle on sewing a straight line.
This is an easy project, perfect for repurposing your pile of saved feed sacks and making them useful again. With the addition of a wooden handle and fewer cuts, this bag will remain strong while keeping the stitches to a minimum.
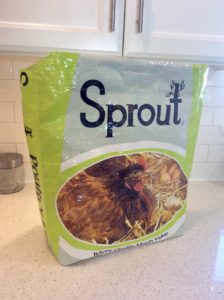
Required Items
- Feed Sack (cloth or tarp-like material)
- Permanent Marker
- Heavy Duty Thread
- Scissors
- 2 ft length of 1/2-inch Wooden Dowel Rod
- Pins
- Sewing Machine
Directions
You’ll start by cutting off the original paper and stitching running across the bottom of your feed sack. Turn the sack inside out and smooth it flat by hand. Use a ruler to mark a straight line across the bottom of the sack, you will proceed to stitch this line shut. Trim excess to 1/2 inch.
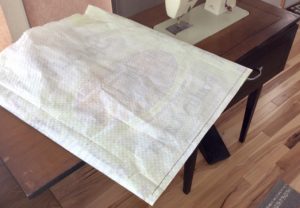
Note: Depending on where you place your bottom stitch line, your bag will be taller or shorter. Before sewing, aim to start with 22-24 inches of material from the top raw edge to the bottom raw edge. Keeping in mind, about 5 inches up from the bottom stitch line, will be the start of the image you’ll see on the front and back of your bag.
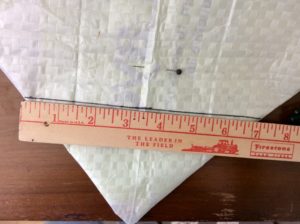
Next, you will open the bag and flatten the corners to the side of the bag as shown in the photo below. This will allow you to form the bottom of the bag. Stitch along the line where the measurement is 7 inches across. Be sure to keep your side crease centered with the bottom stitch line. Once both sides are completely sewn, trim excess to 1/2 inch.

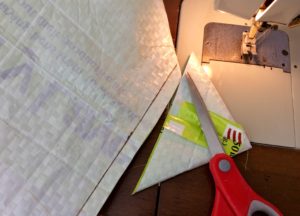
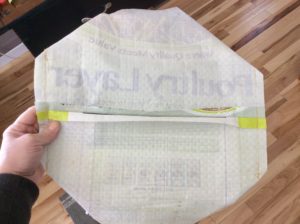
Moving to the top lip of the bag, pin together the tote sides, keeping the creases centered. I used a template that I traced from a small lunch plate to create the side cutouts of my bag. My template measurements were 8-1/2 inches wide along the top edge of the bag and 4-1/2 inches down the side. Cut this semi-circle out on each side of your bag.

If you happen to have a feed sack that shows a likelihood of unraveling, singe the cut edges with a lighter.

Fold your bag so the front and back of the bag are now facing each other. While still inside out, fold the uncut, raw edge of your bag towards the outside, approximately 3 inches. As shown in the photo, you will now stitch along one side and the bottom of your newly made flap, leaving the other side open. Do this on each side of your tote.
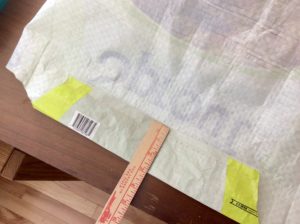
Once sewn, measure the width of your flap. Using this measurement, reduce by 2 inches and cut two lengths of wooden dowel. In the following photo, the measure from sewn seam to expected sewn seam is 13 inches. I required an 11-inch length of dowel for each handle.
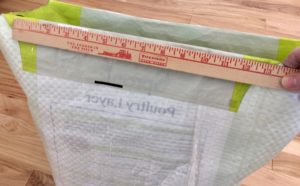
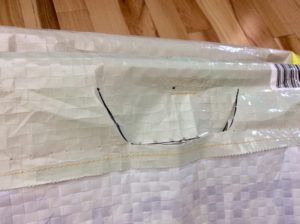
To prepare the bag for handles, from the center, measure 1-1/2 inches down from the top flap edge and place a dot. Two inches to the left and right of this dot, make a mark. 1-1/2 inches down from the original dot, make another mark. Connect the marks as shown and cut an opening through both layers of the feed sack. Repeat on the opposite side.

Slide the dowel into place within the handle flap. Once inserted, stitch the end of the flap shut. At this point, you can choose to run a stitch along the base of the dowel to keep it in place. This is optional as the dowel has nowhere to go!
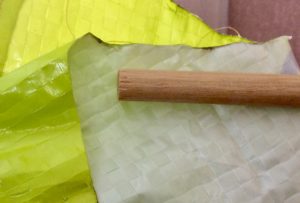
Once you’ve completed the steps for both handles your bag can be turned right side out! Viola! You should now have a bag worthy of carrying up to 50 pounds. An optional cardboard insert can be placed in the bottom of the bag for added strength and durability.


1 Comment
I made tarps out of them. Works great.!!!